Global “Publish” settings
Set embed, tracking, and data collection defaults once at the project level, and they apply to every Riddle in that project. This saves time and ensures consistency – individual Riddles can still override global settings if needed. Available on Enterprise plans.
Configure project embed settings
Riddles normally update automatically but this feature will change your original embed settings so you need to copy and paste it again.
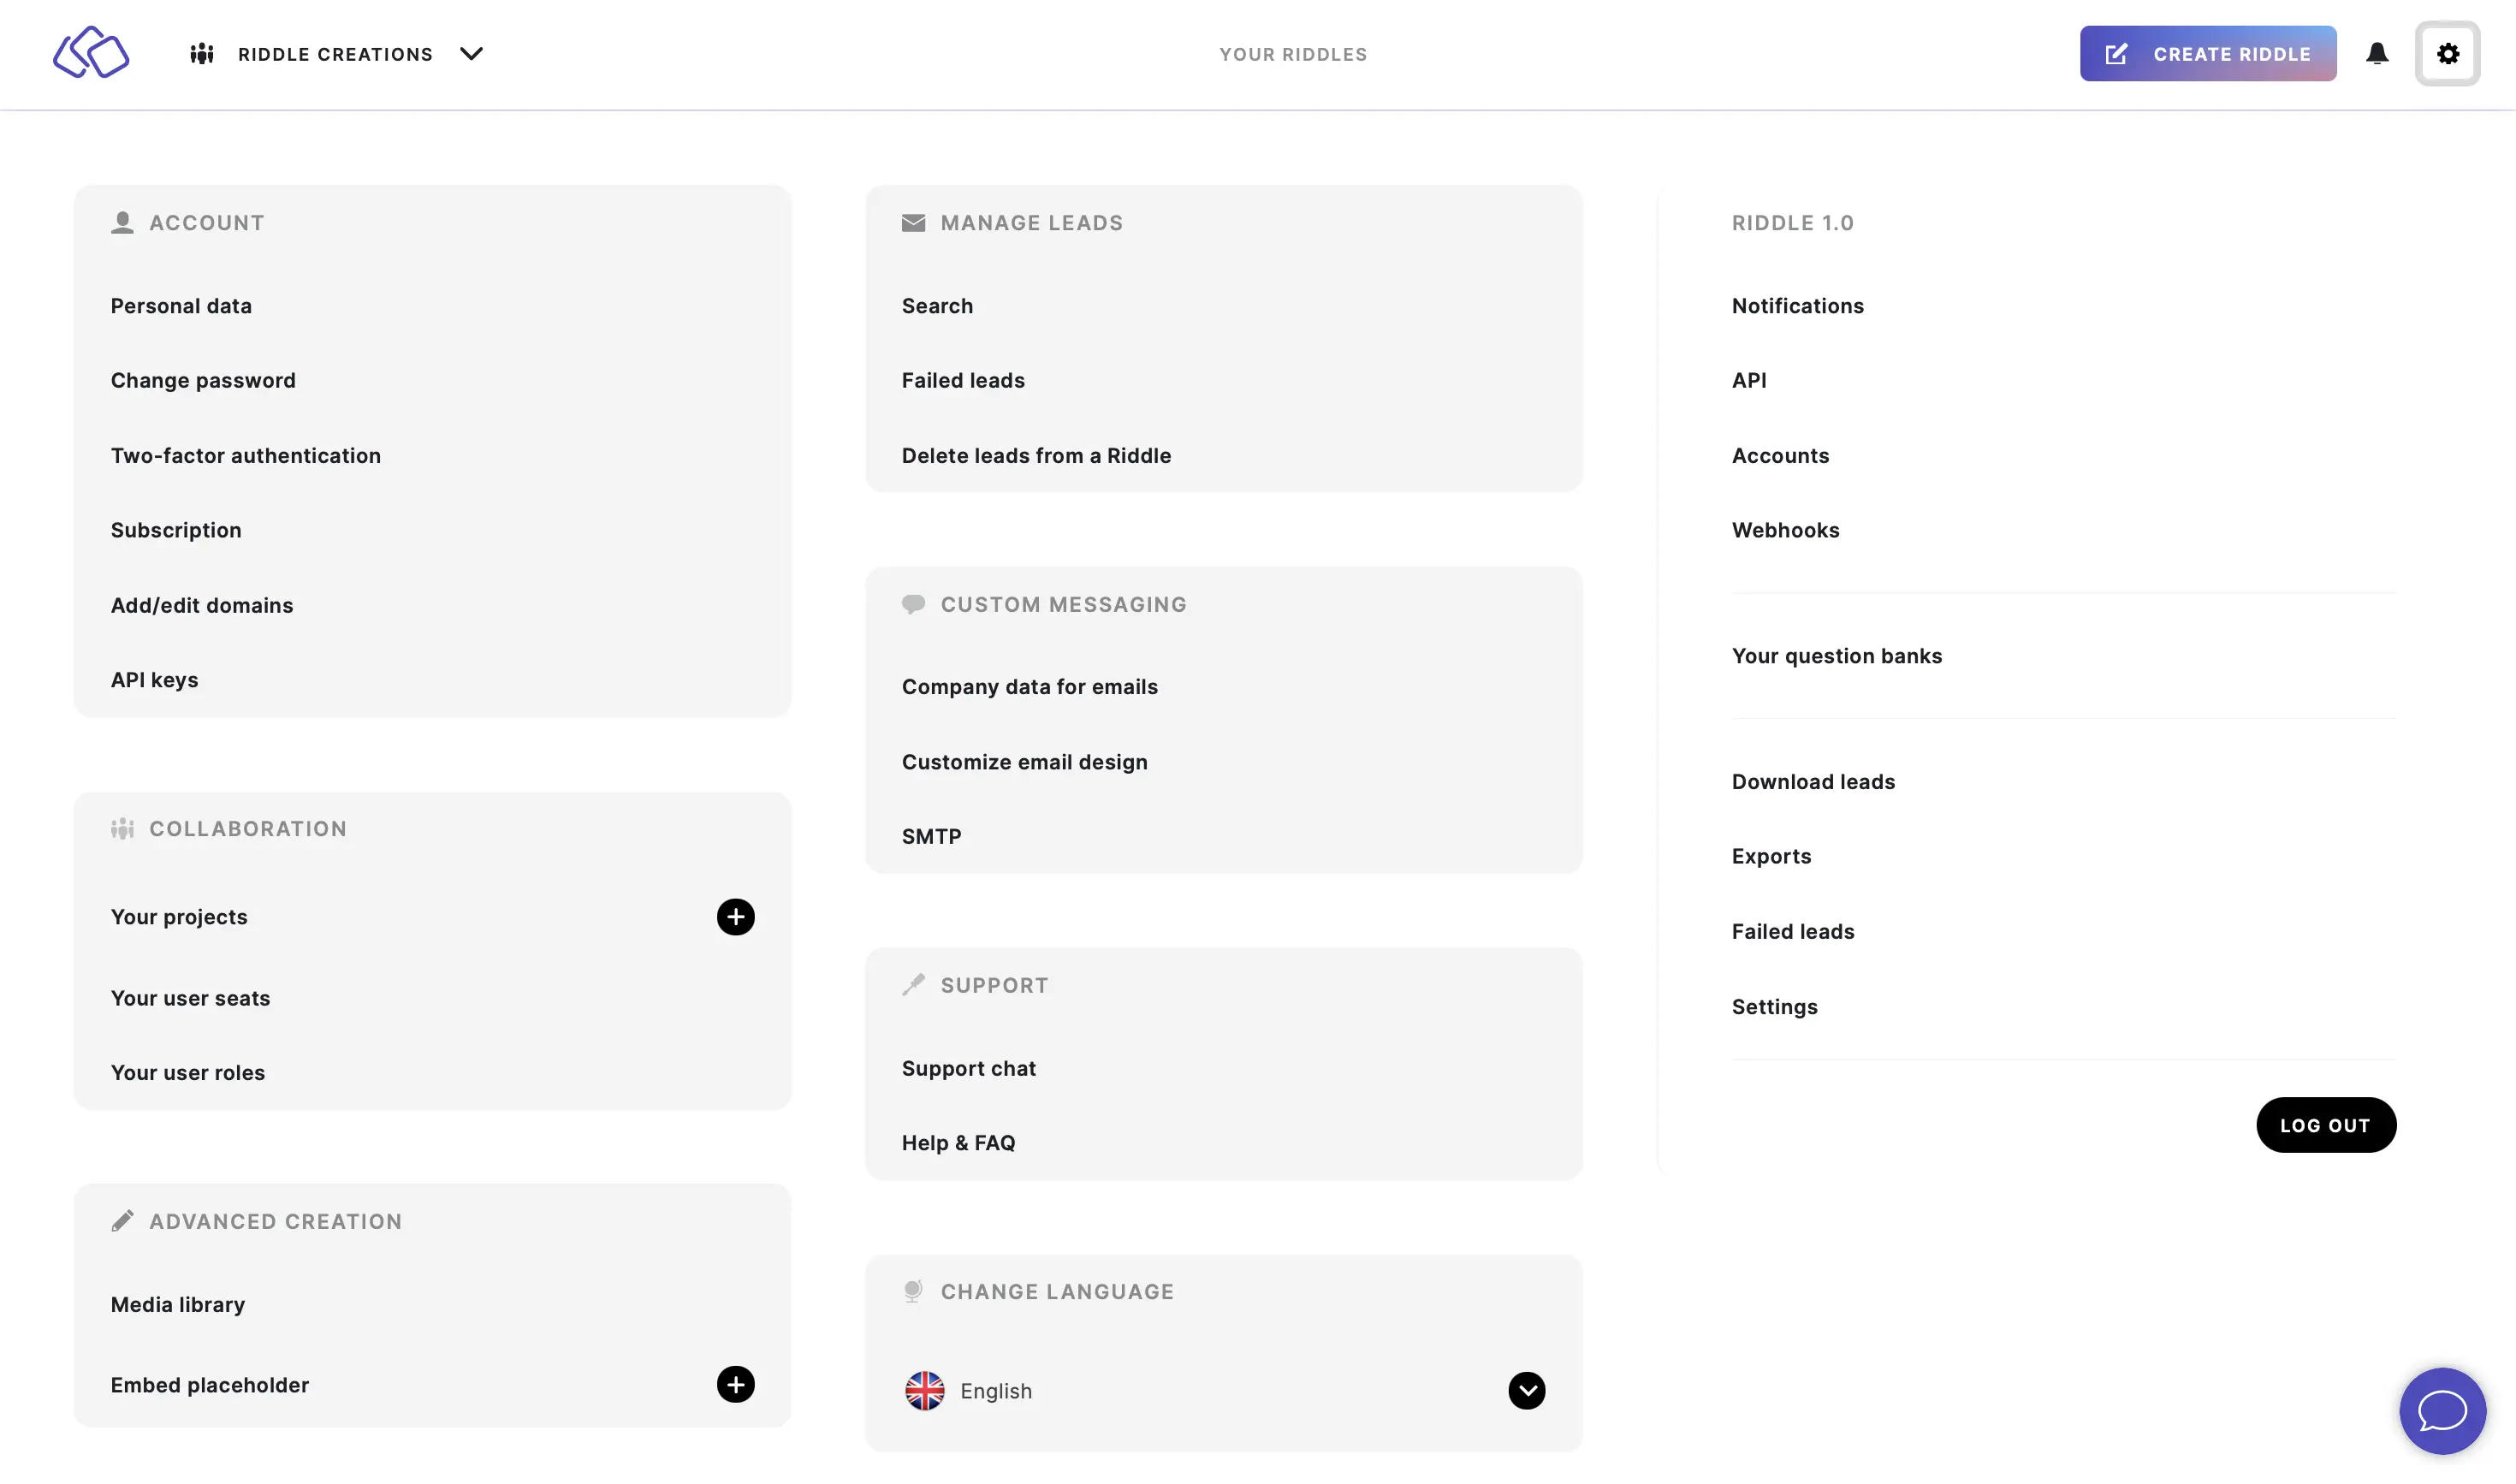
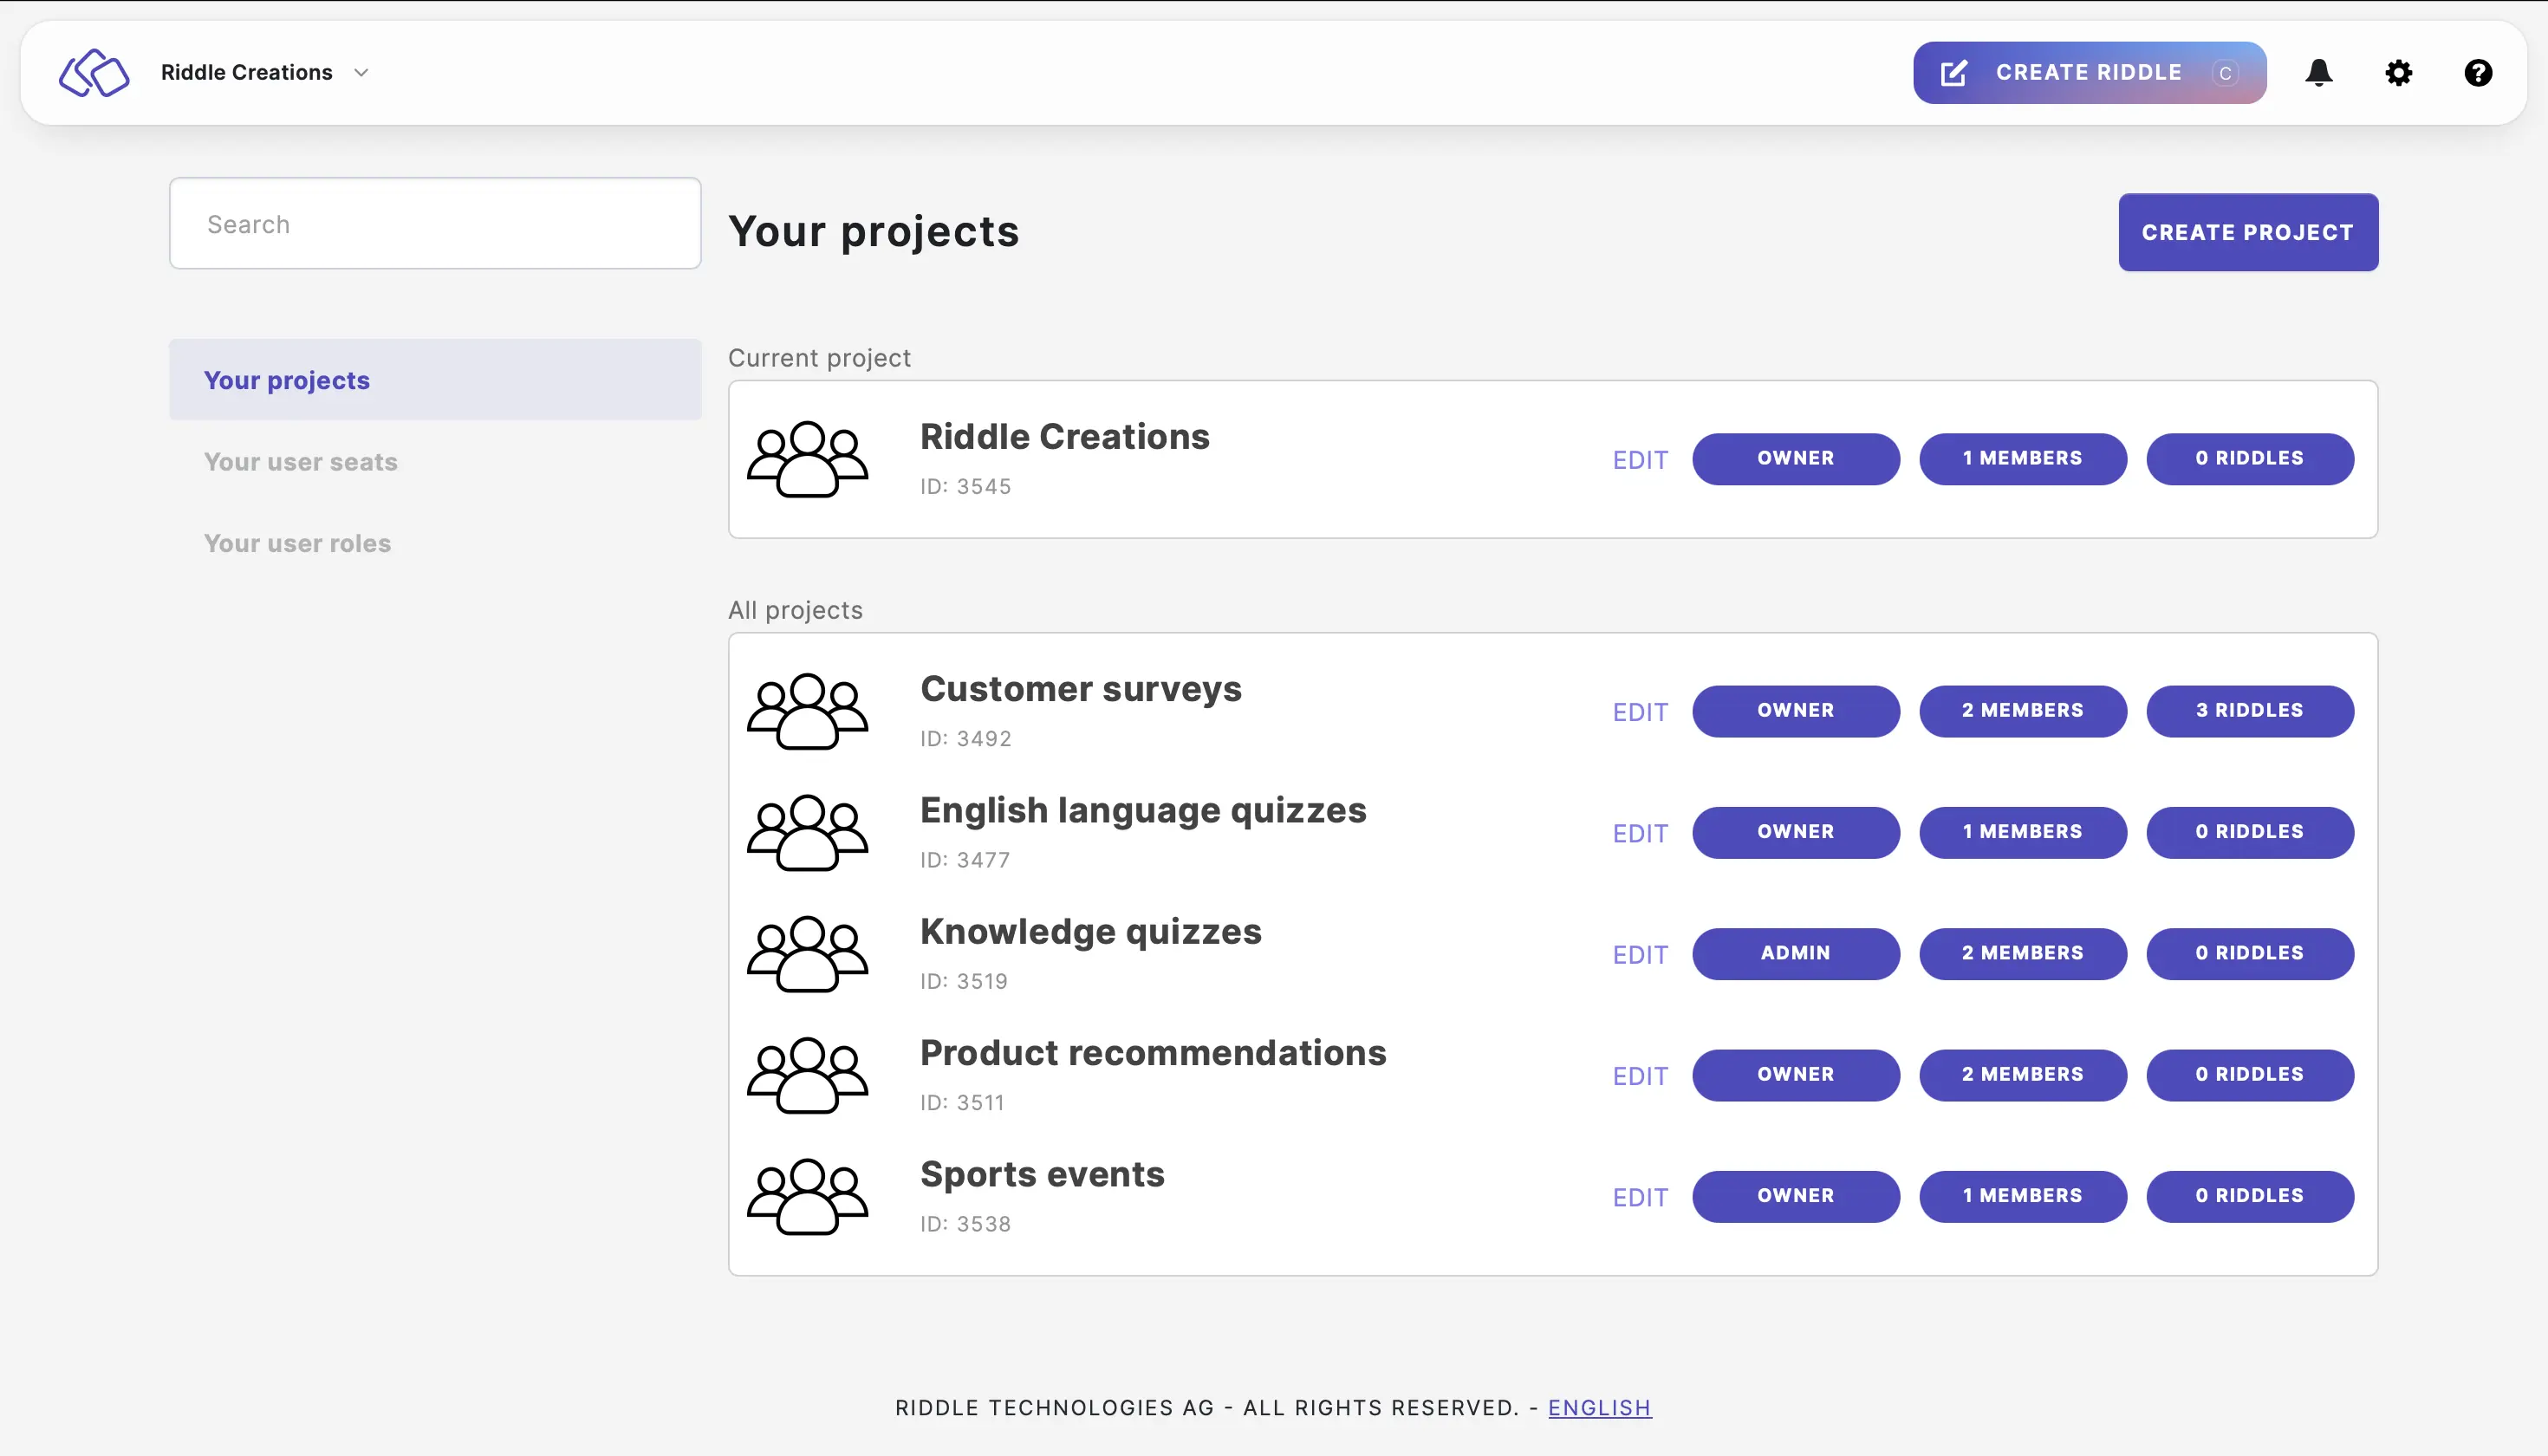
- Go to the main menu in the top right corner and click on Your projects under COLLABORATION.
- Click on one of your projects.
- Click on Global "Publish" settings > EMBED and then enable Configure global "Embed" settings.
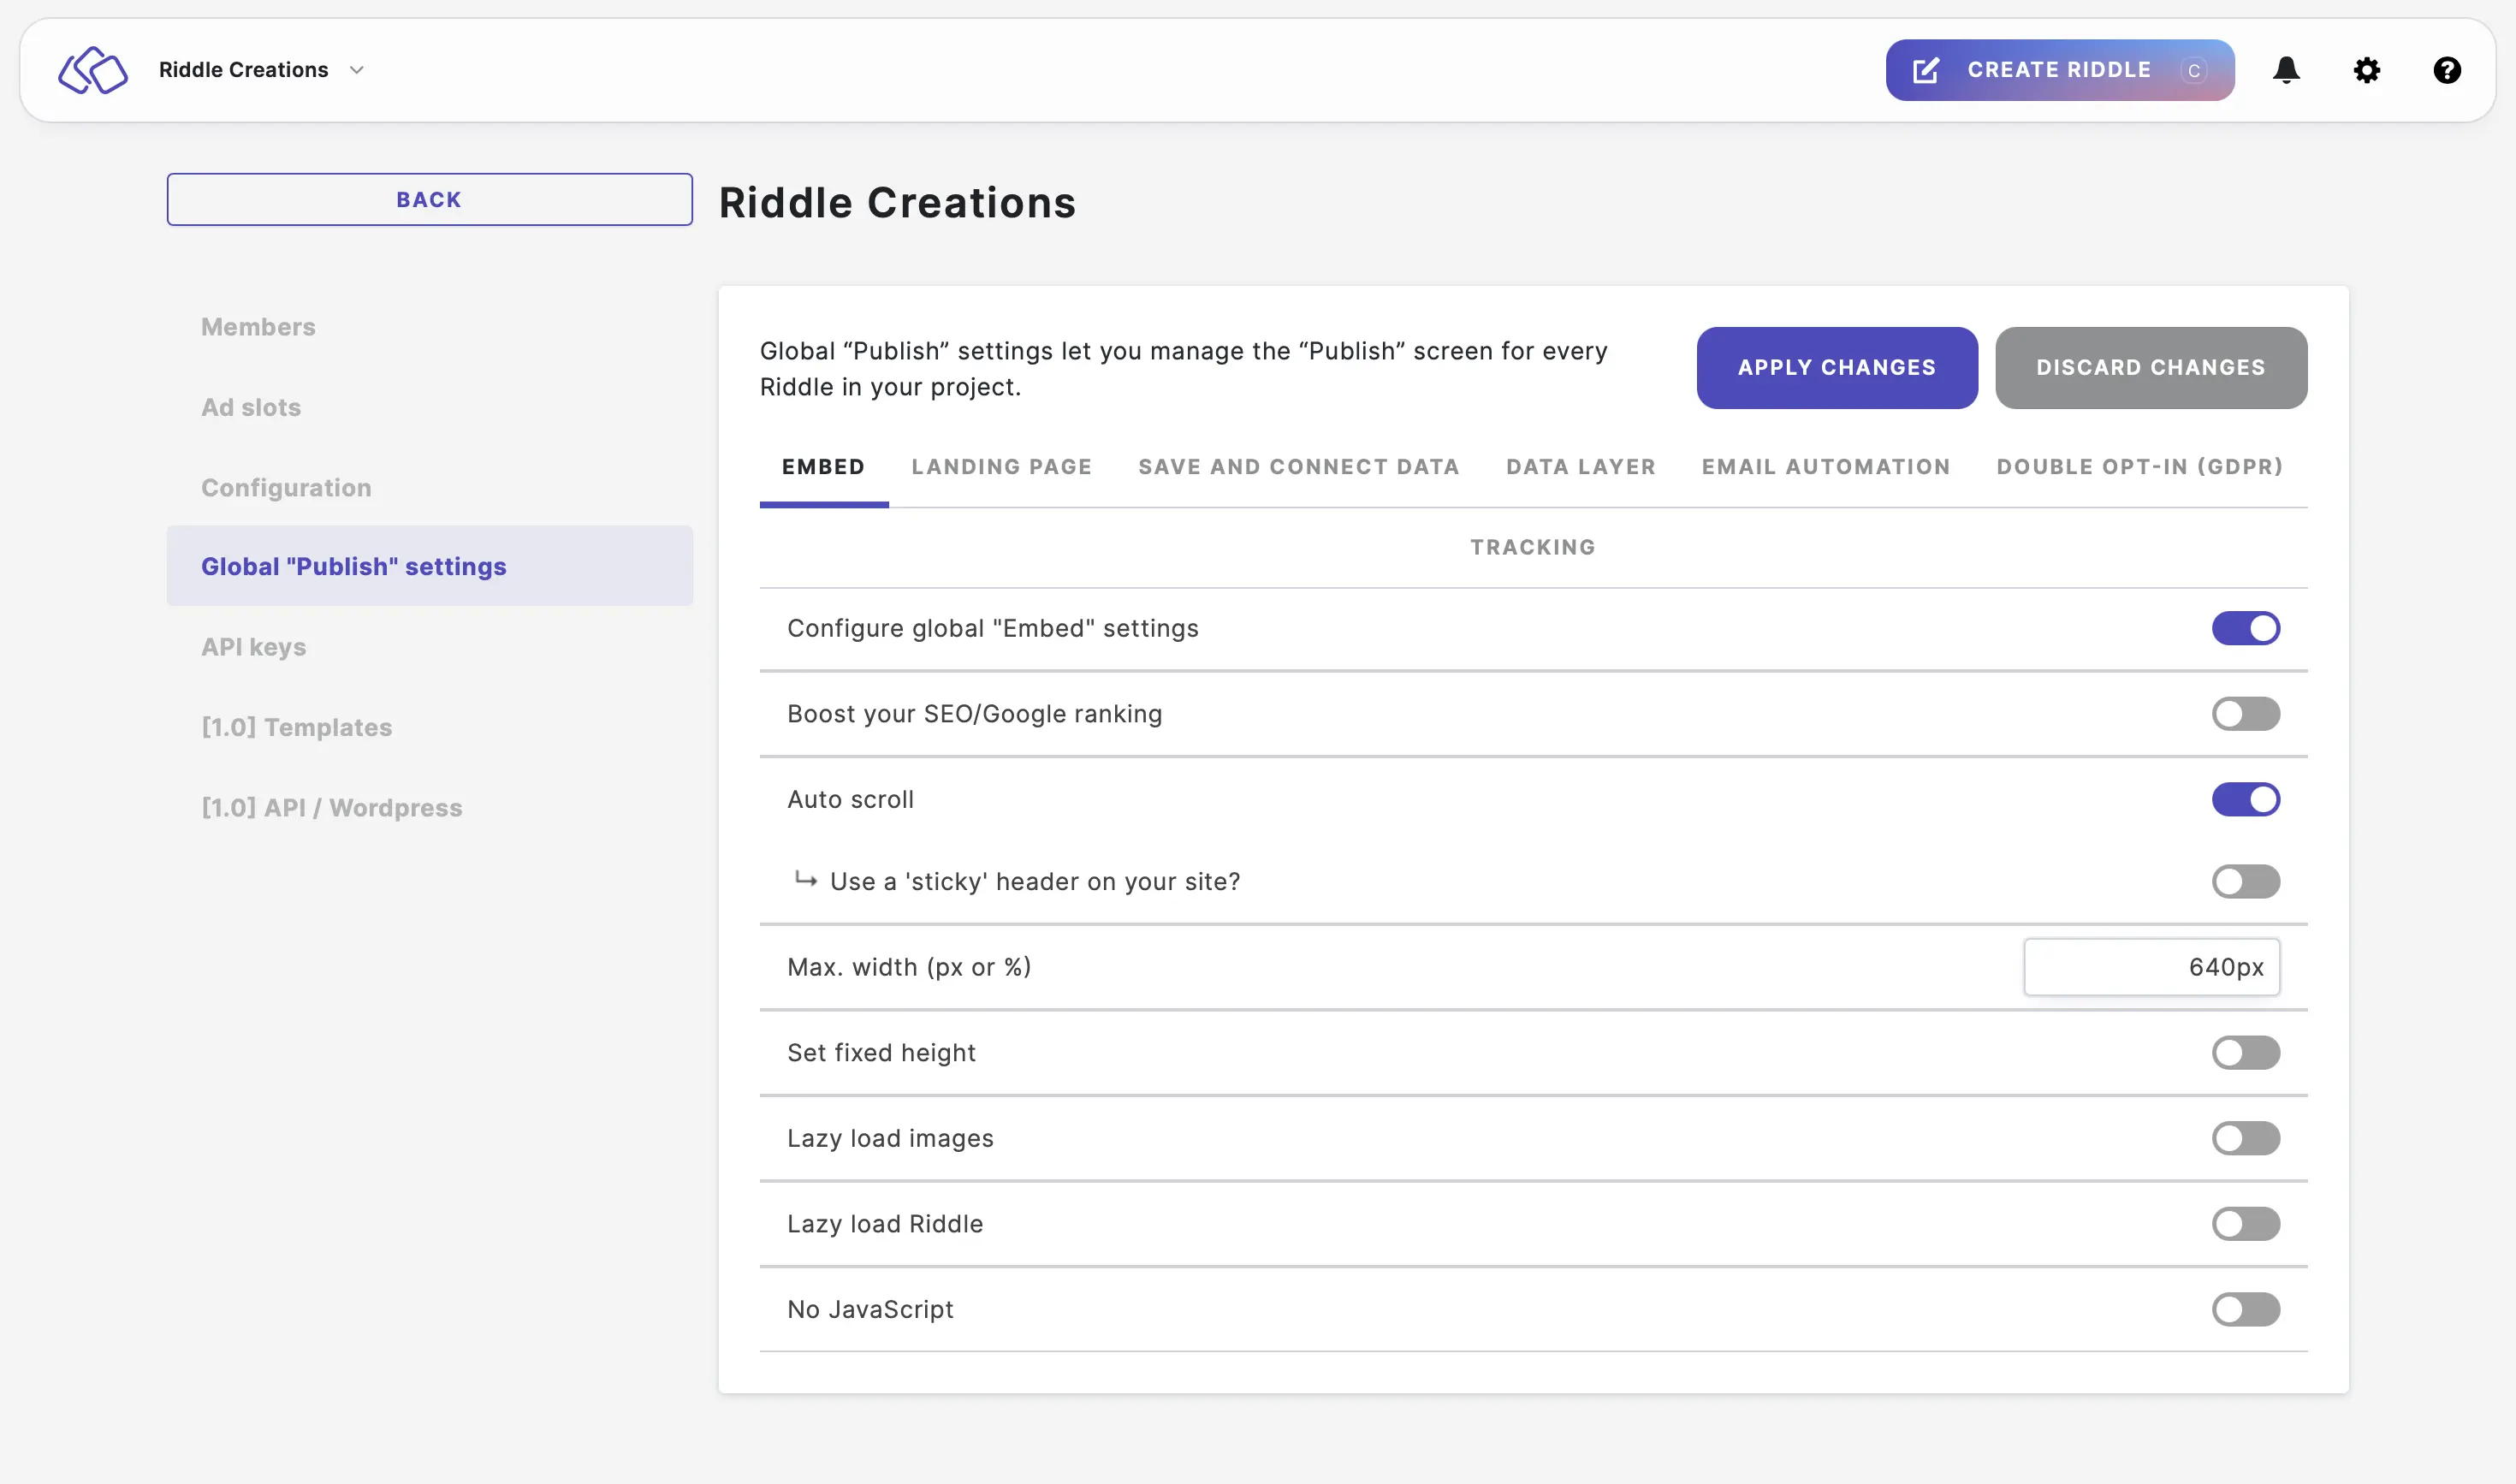
- Enable Boost your SEO/Google ranking to get more traffic to your sites containing your project's Riddles. Your embed codes will include all the text from your Riddle, including questions, answers, and explanations. This will be readable by Google and will help boost your site's SEO ranking.
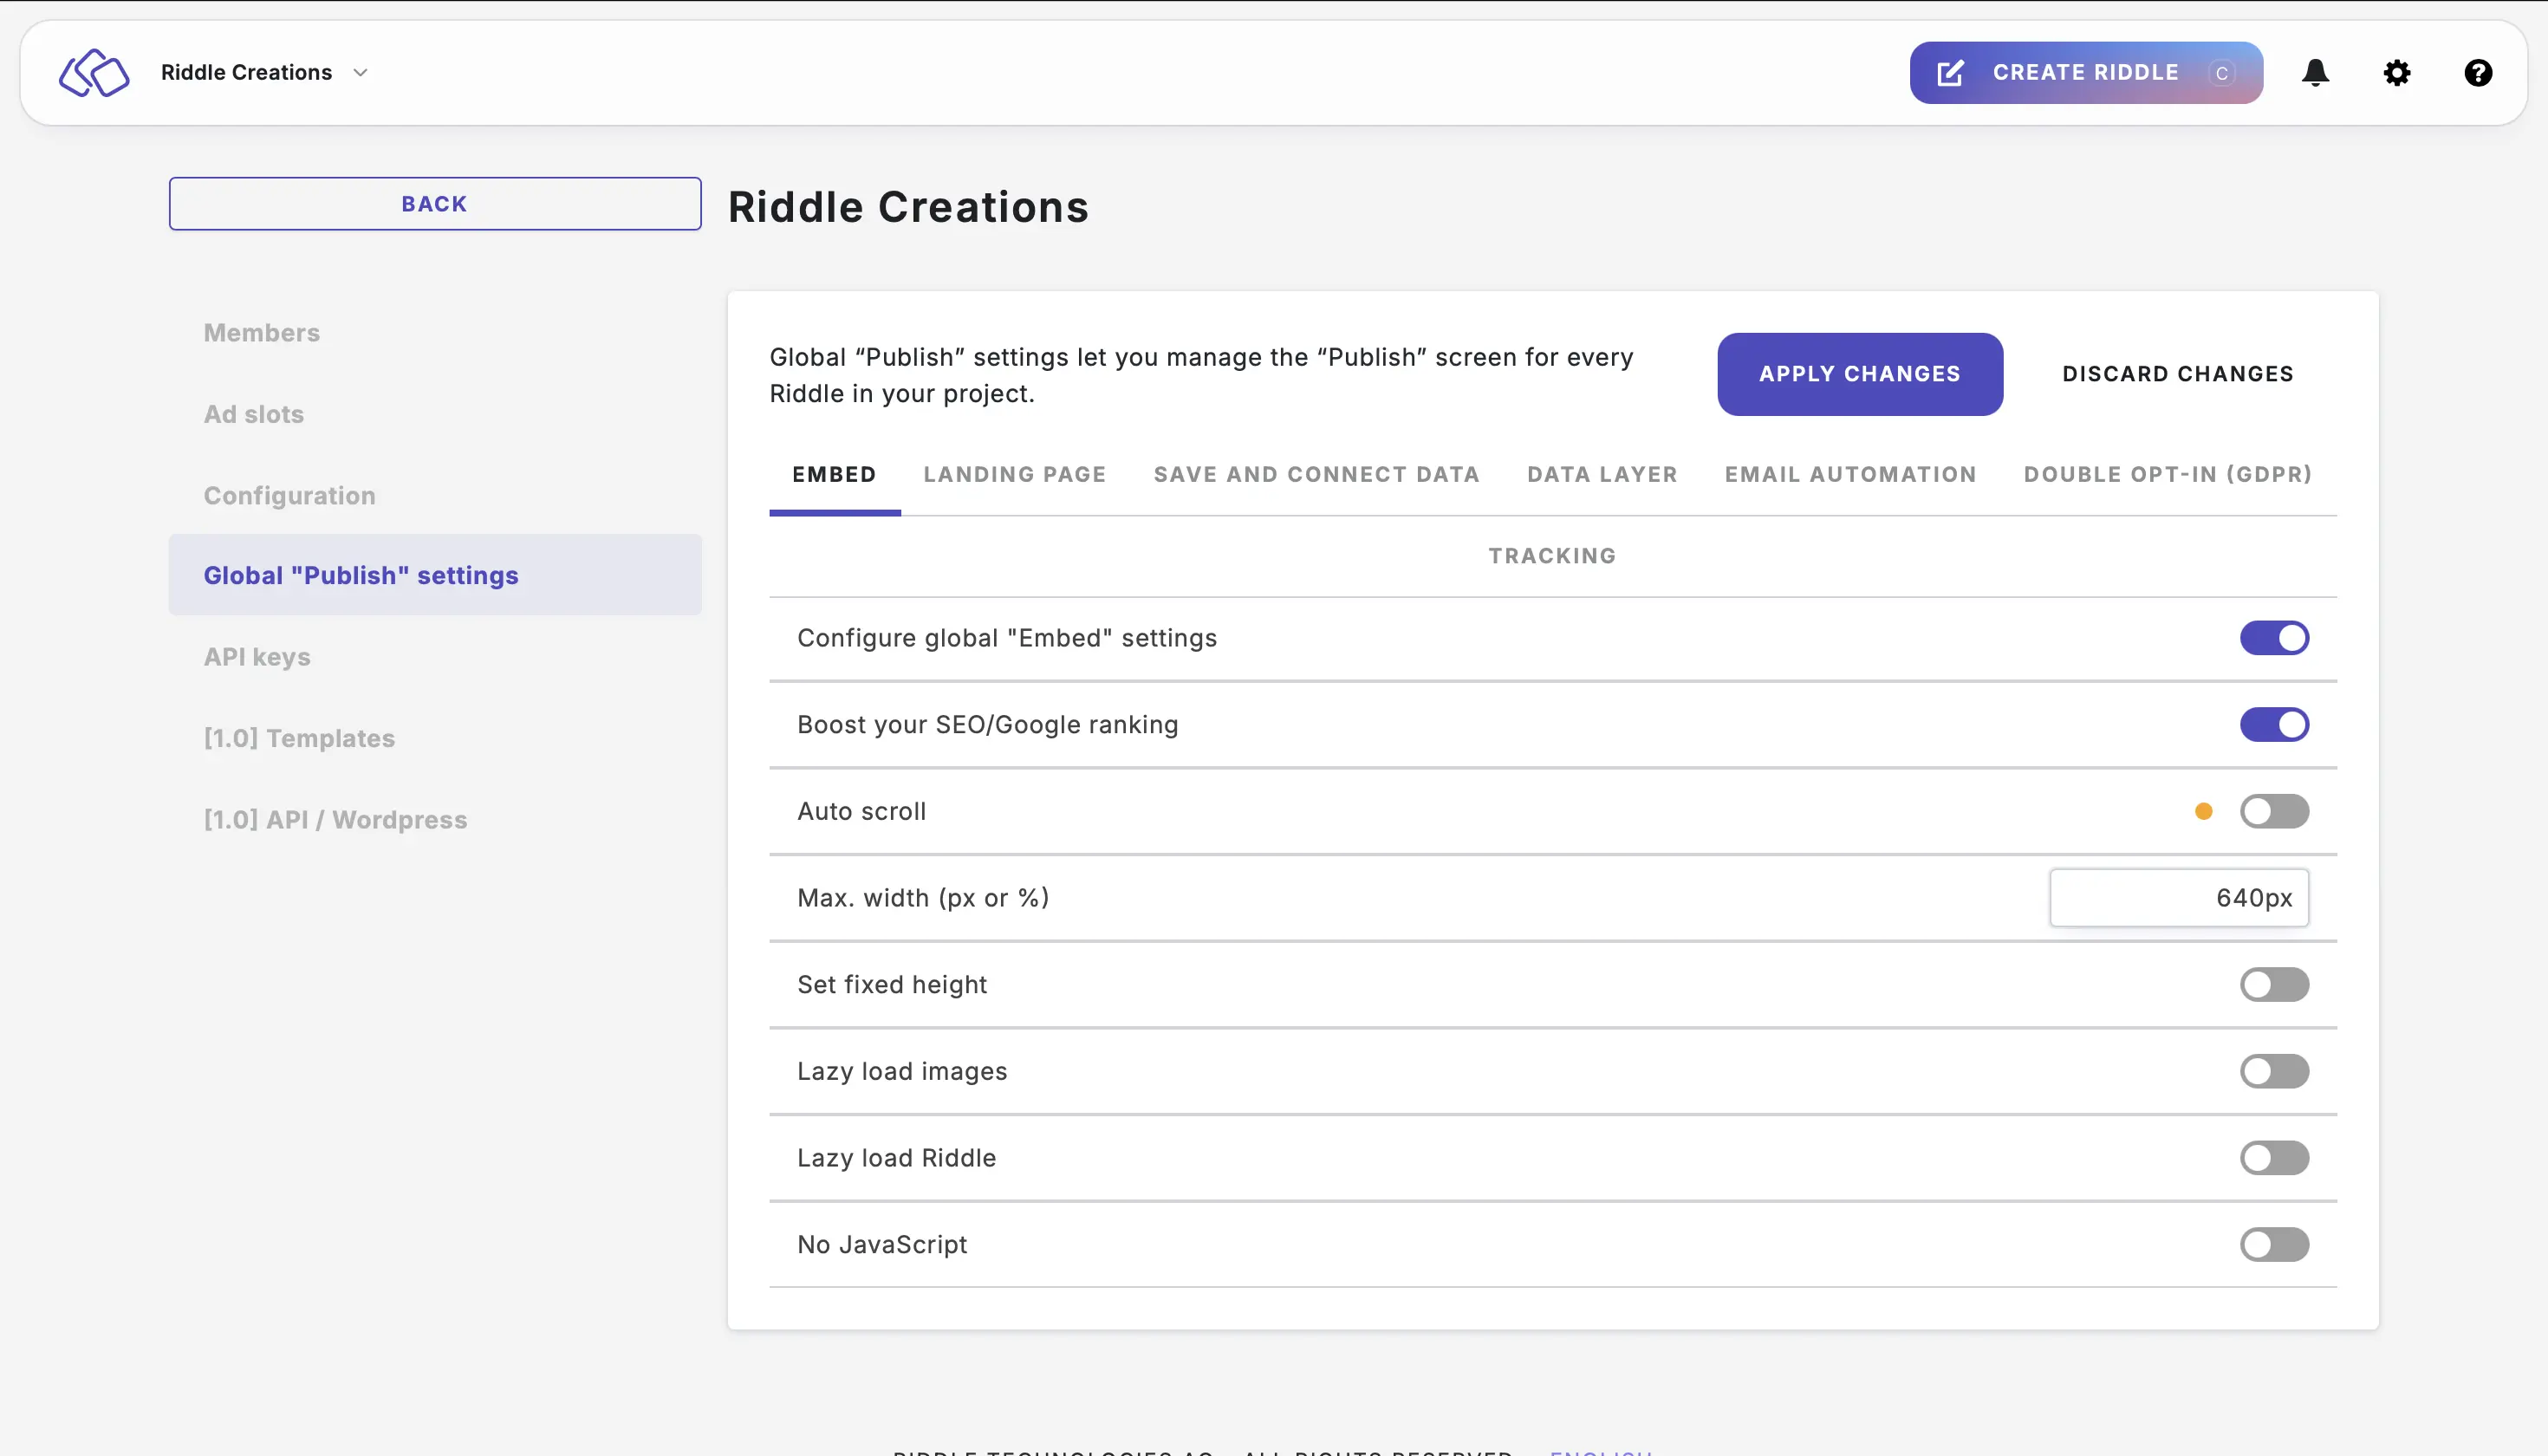
- Enable Auto scroll to change the display of your Riddles.
Riddles normally jump back to the top after each question. If this is not working for your website, you can try this option.
- Enable Use a 'sticky' header on your site if your Riddles appears under a header bar on your site. This ensures your Riddles are pushed down that amount so it will always appear below it and be fully visible to your audience.
- You can then enter a height into the Auto scroll offset field.
We recommend starting with 150px and adjusting as needed. Or you can also measure the height of your menu bar in pixels. Chrome has some free extensions like this one. Alternatively, start with 150px and adjust as needed.
- Change the Max. width if you want to make your Riddles wider or narrower on the sites where they are embedded. We recommend 640px. Our standard embed code will resize automatically for smartphones and tablets. For example, if you set your max width to 1200px (almost full page), your Riddles will still resize automatically to smaller screens.
Please note: Resizing only works with JavaScript and CSS enabled.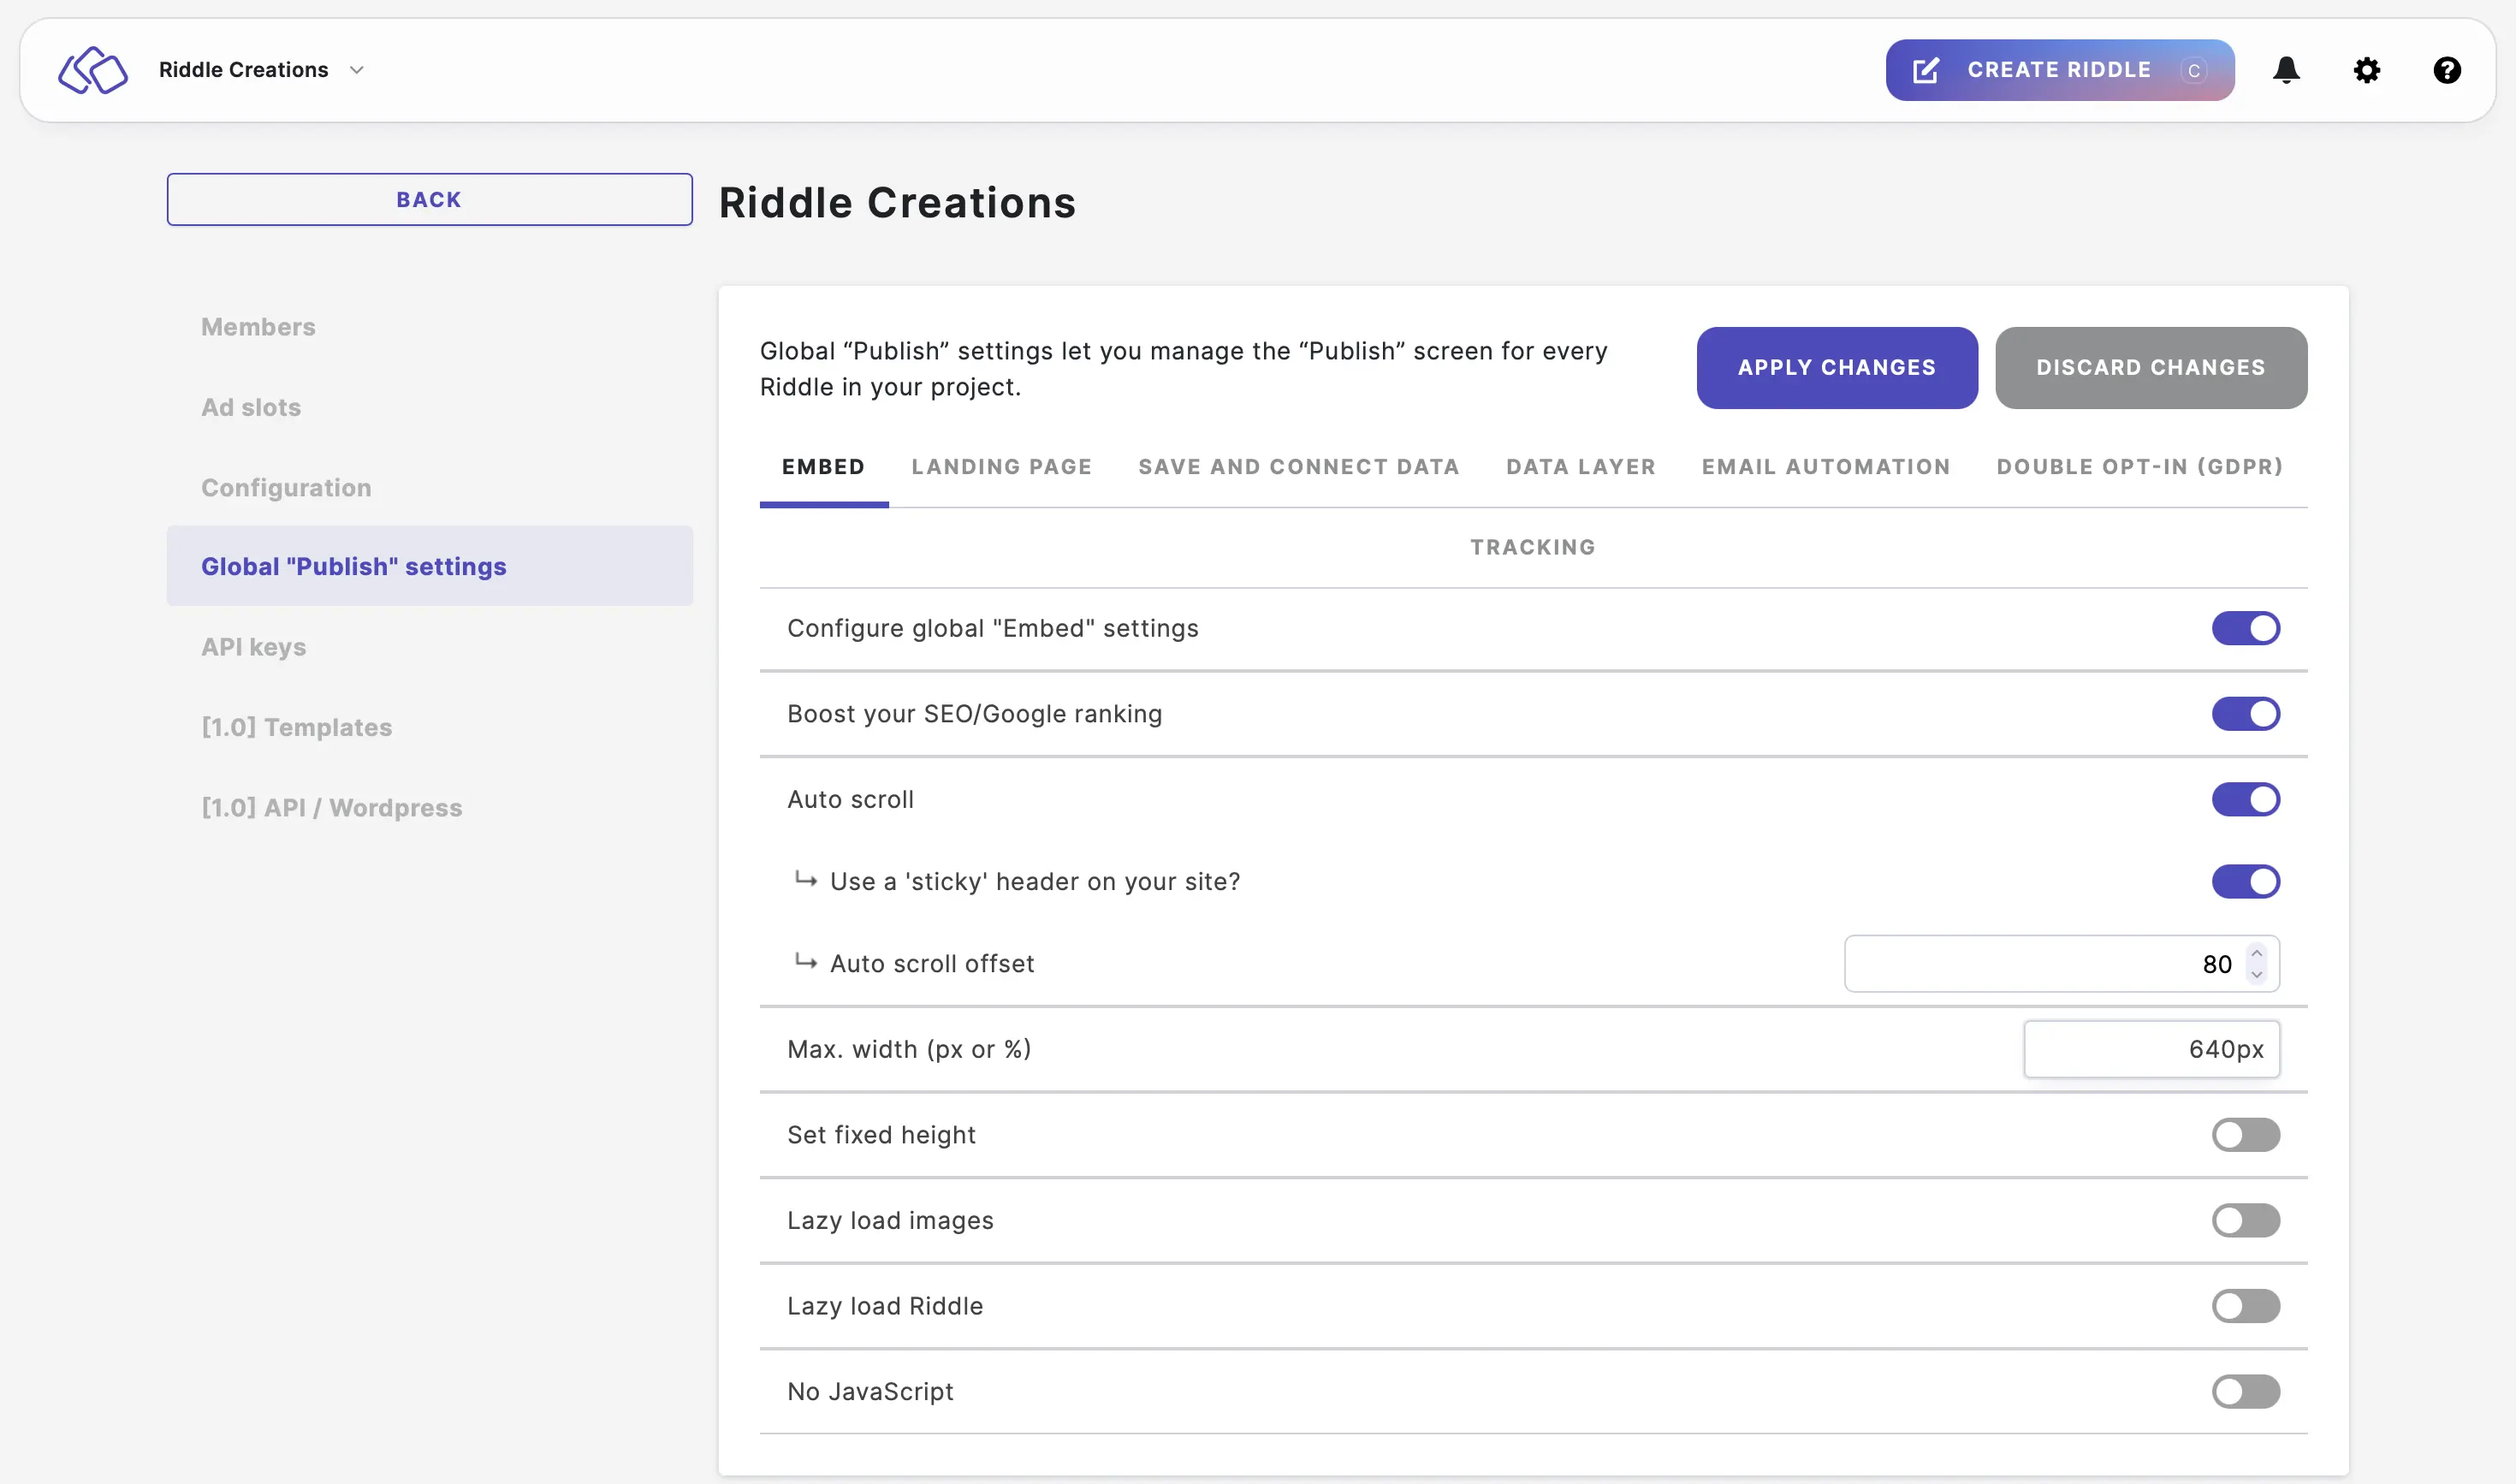
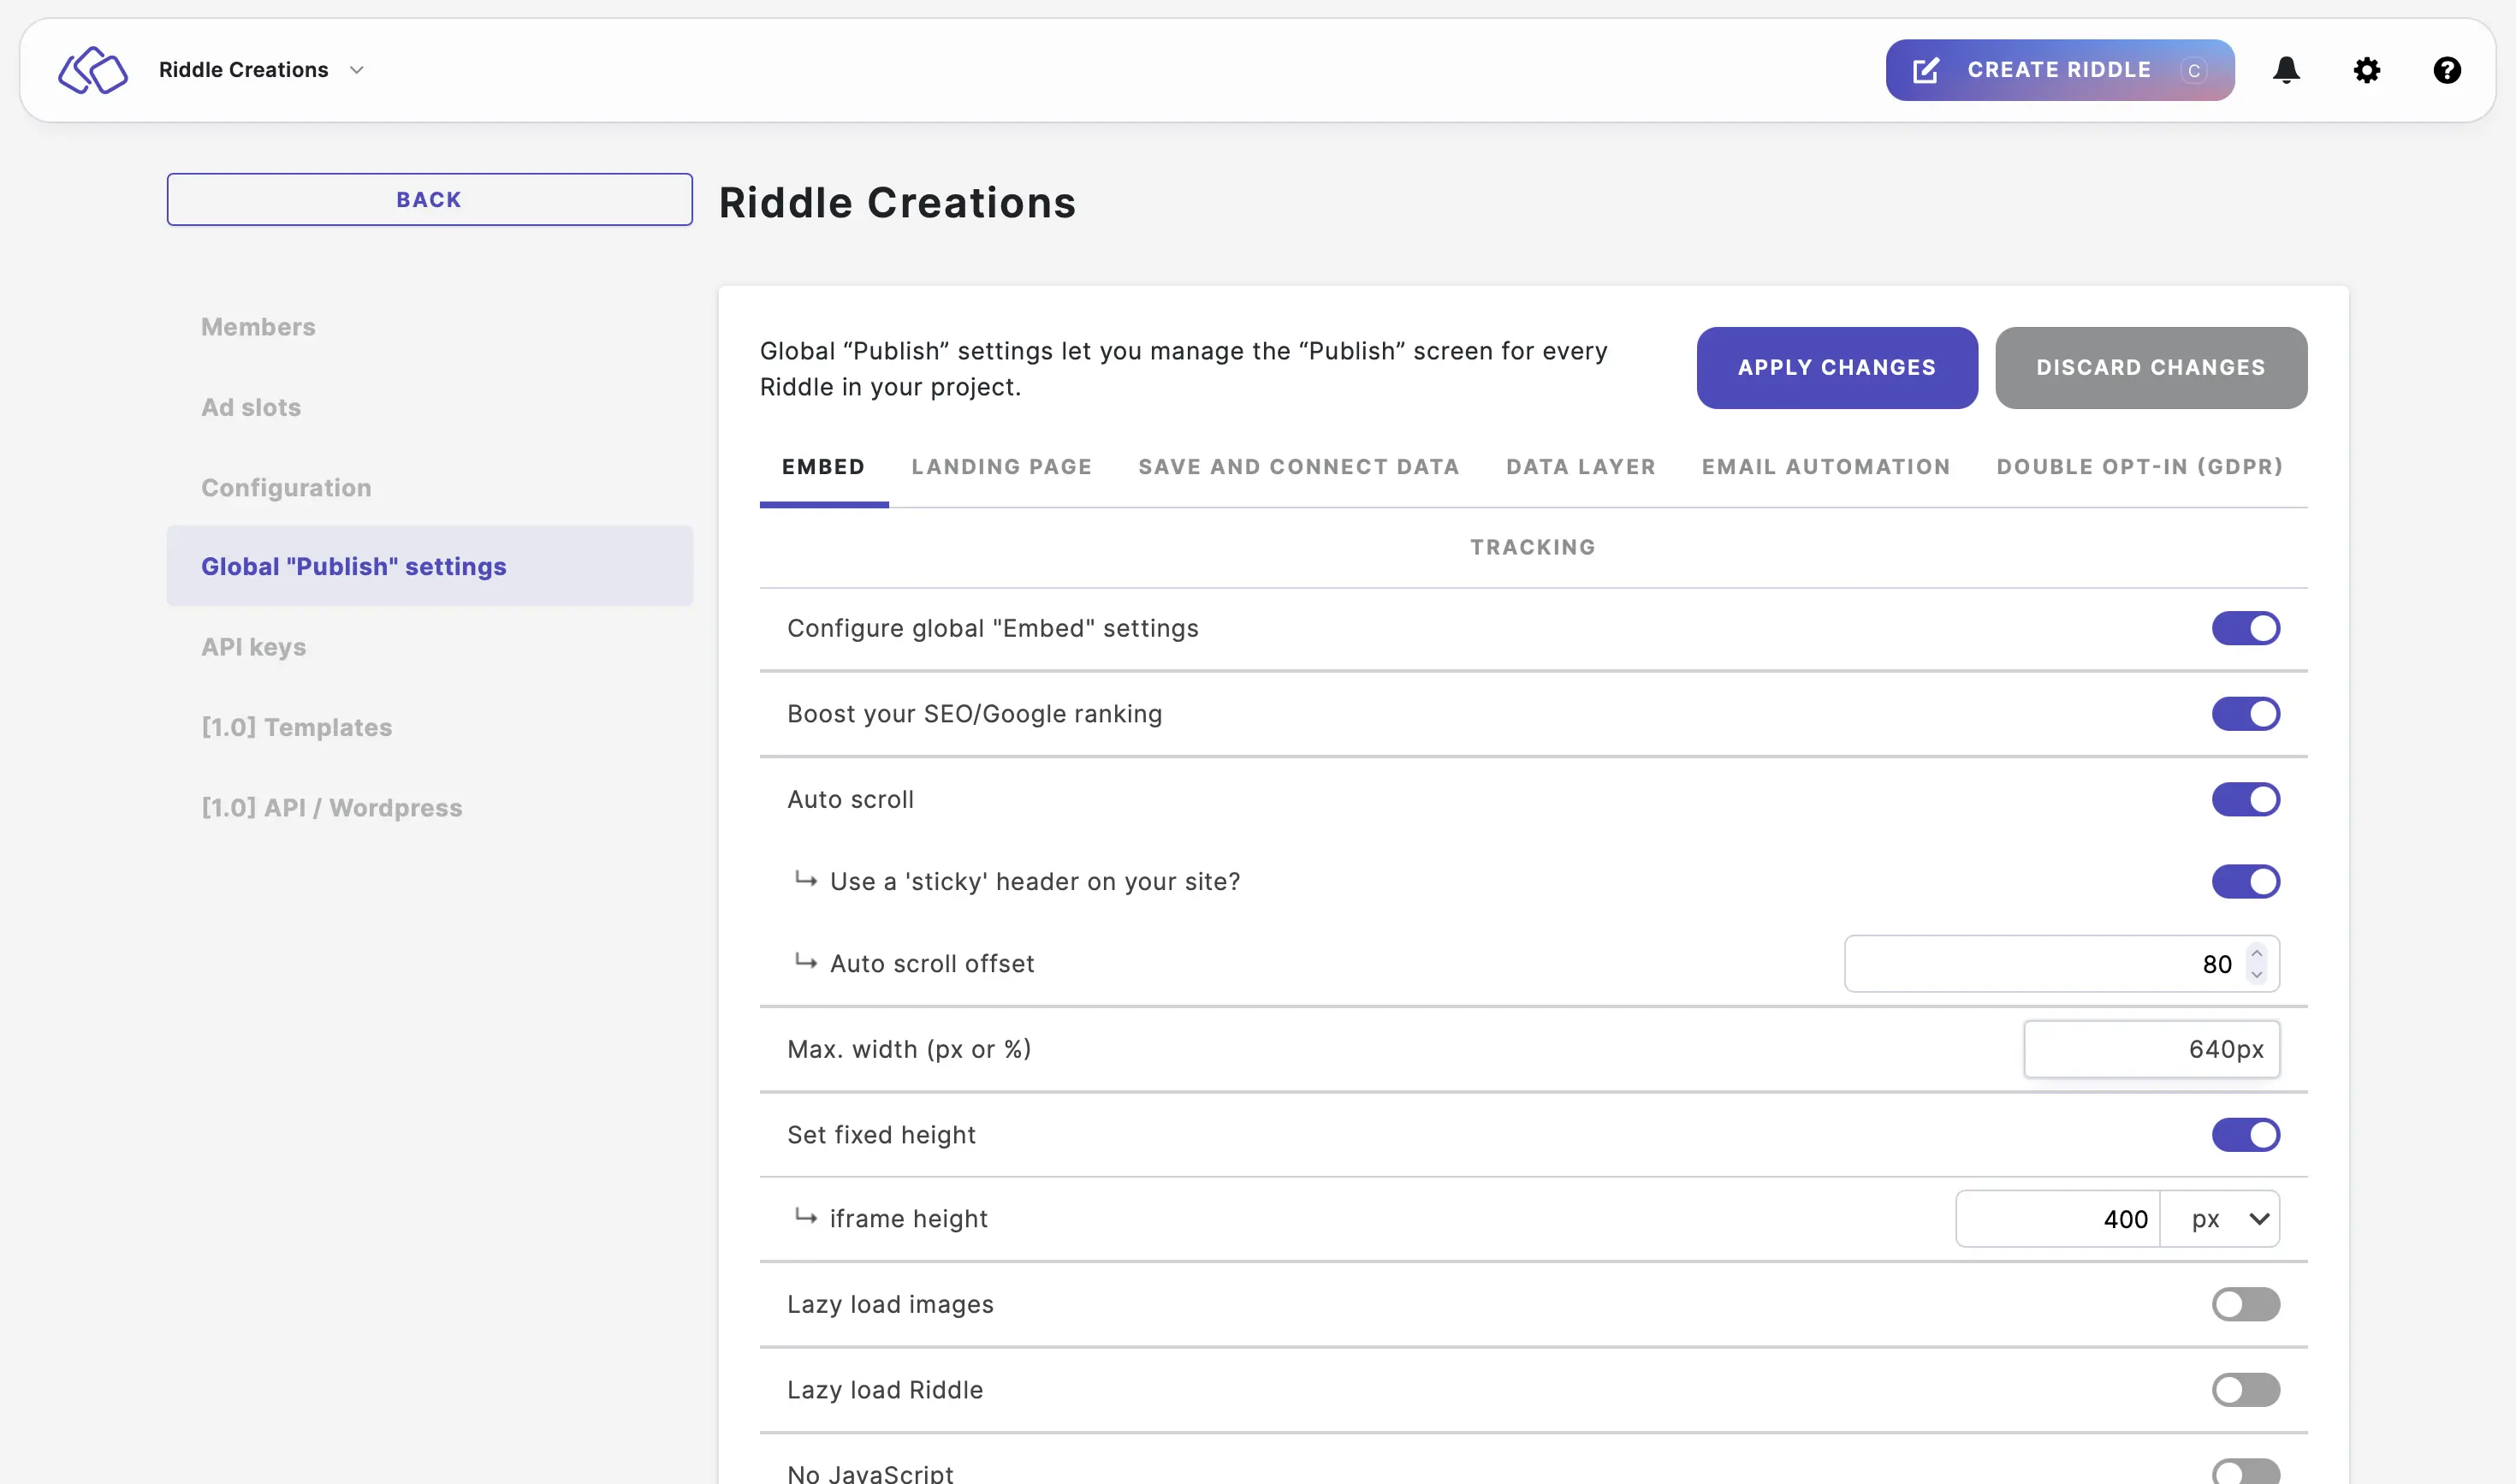
- Enable Set fixed height if you want to make your Riddles taller or shorter on the site where it is embedded. You can then enter an iframe height and select the unit from the dropdown menu.
- Enable Lazy load images to load images 'just in time' before they reach your audience. When it is disabled, all your Riddle images are loaded before letting your audience start the Riddle.

- Enable Lazy load Riddle to only load your Riddles when it is actually visible to your audience (recommended). This speeds up your pages' load times. When it is disabled, the Riddles load every time the pages load.
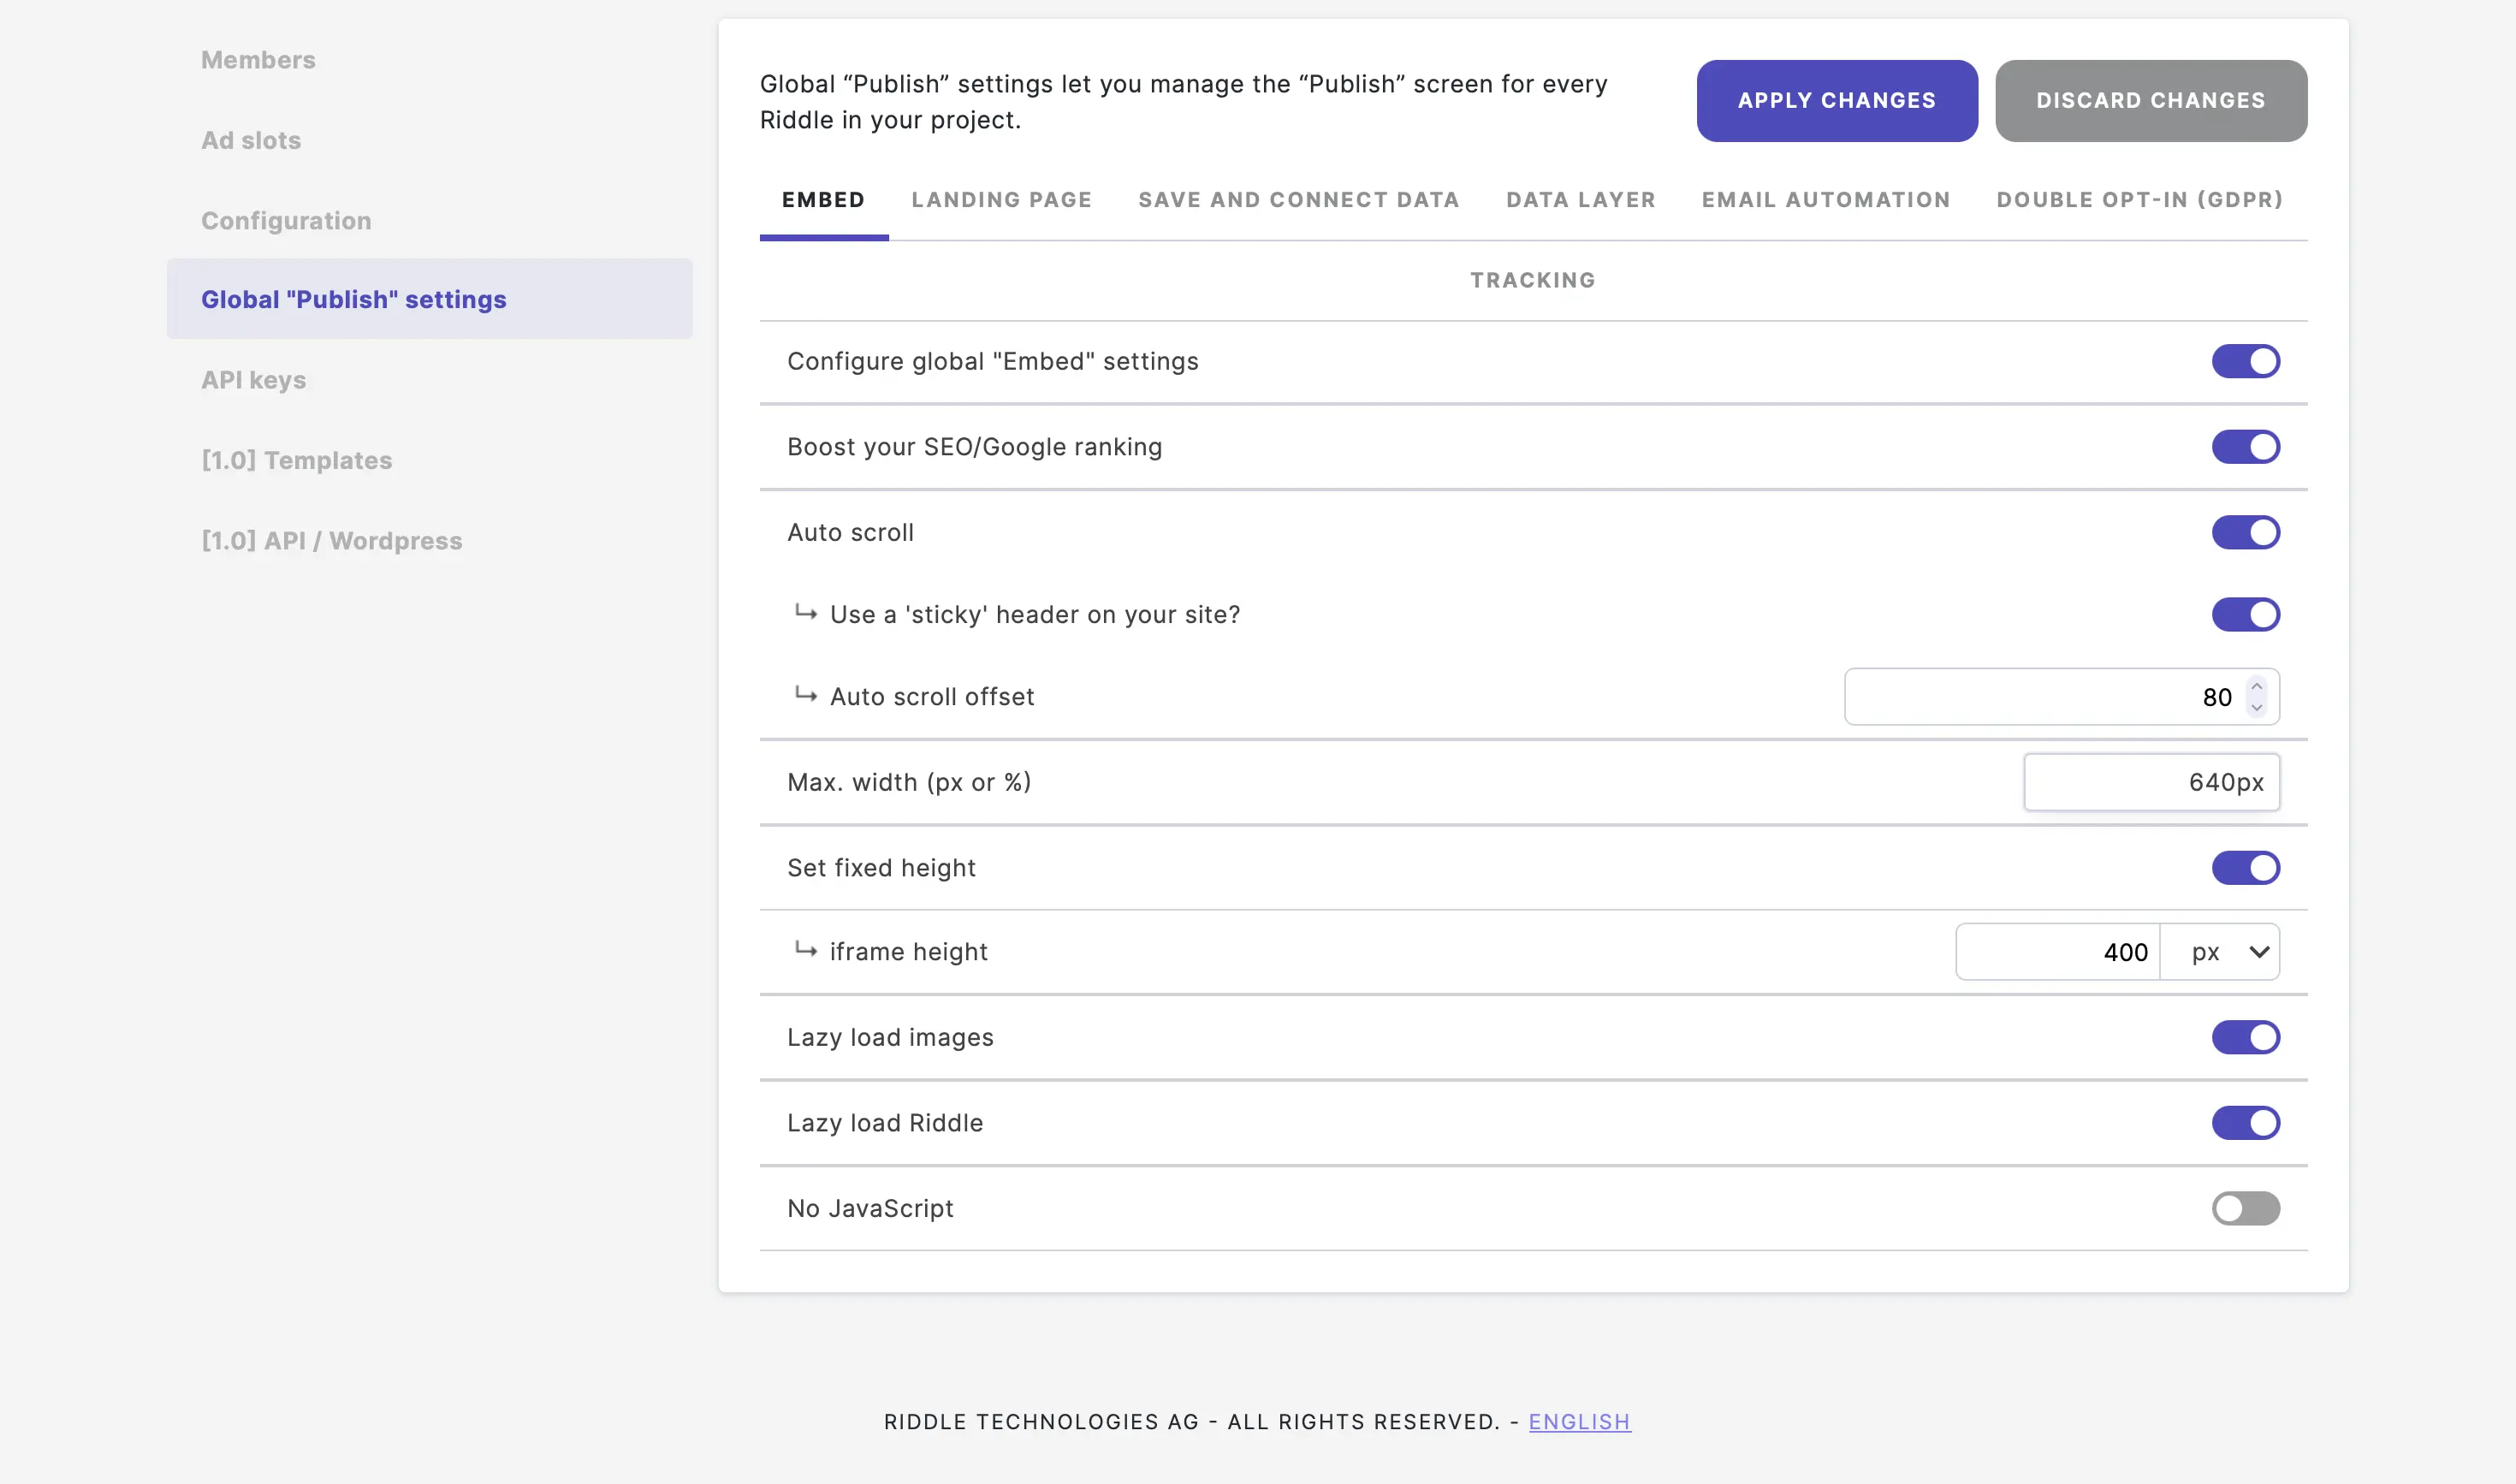
- Enable No JavaScript to removed JavaScript from our embed codes.
Riddle embed codes work in 99% of all web tools but this can help if you are still having issues. The downside is your Riddles will not resize automatically to smaller screens.

- Copy and paste your embed codes again.
Configure project landing page settings
- Go to the main menu in the top right corner and click on Your projects under COLLABORATION.
- Click on one of your projects.
- Click on Global "Publish" settings > LANDING PAGE and then enable Configure global "Landing page" settings. Publish on Riddle's landing page is enabled by default to run Riddles on their own landing pages.
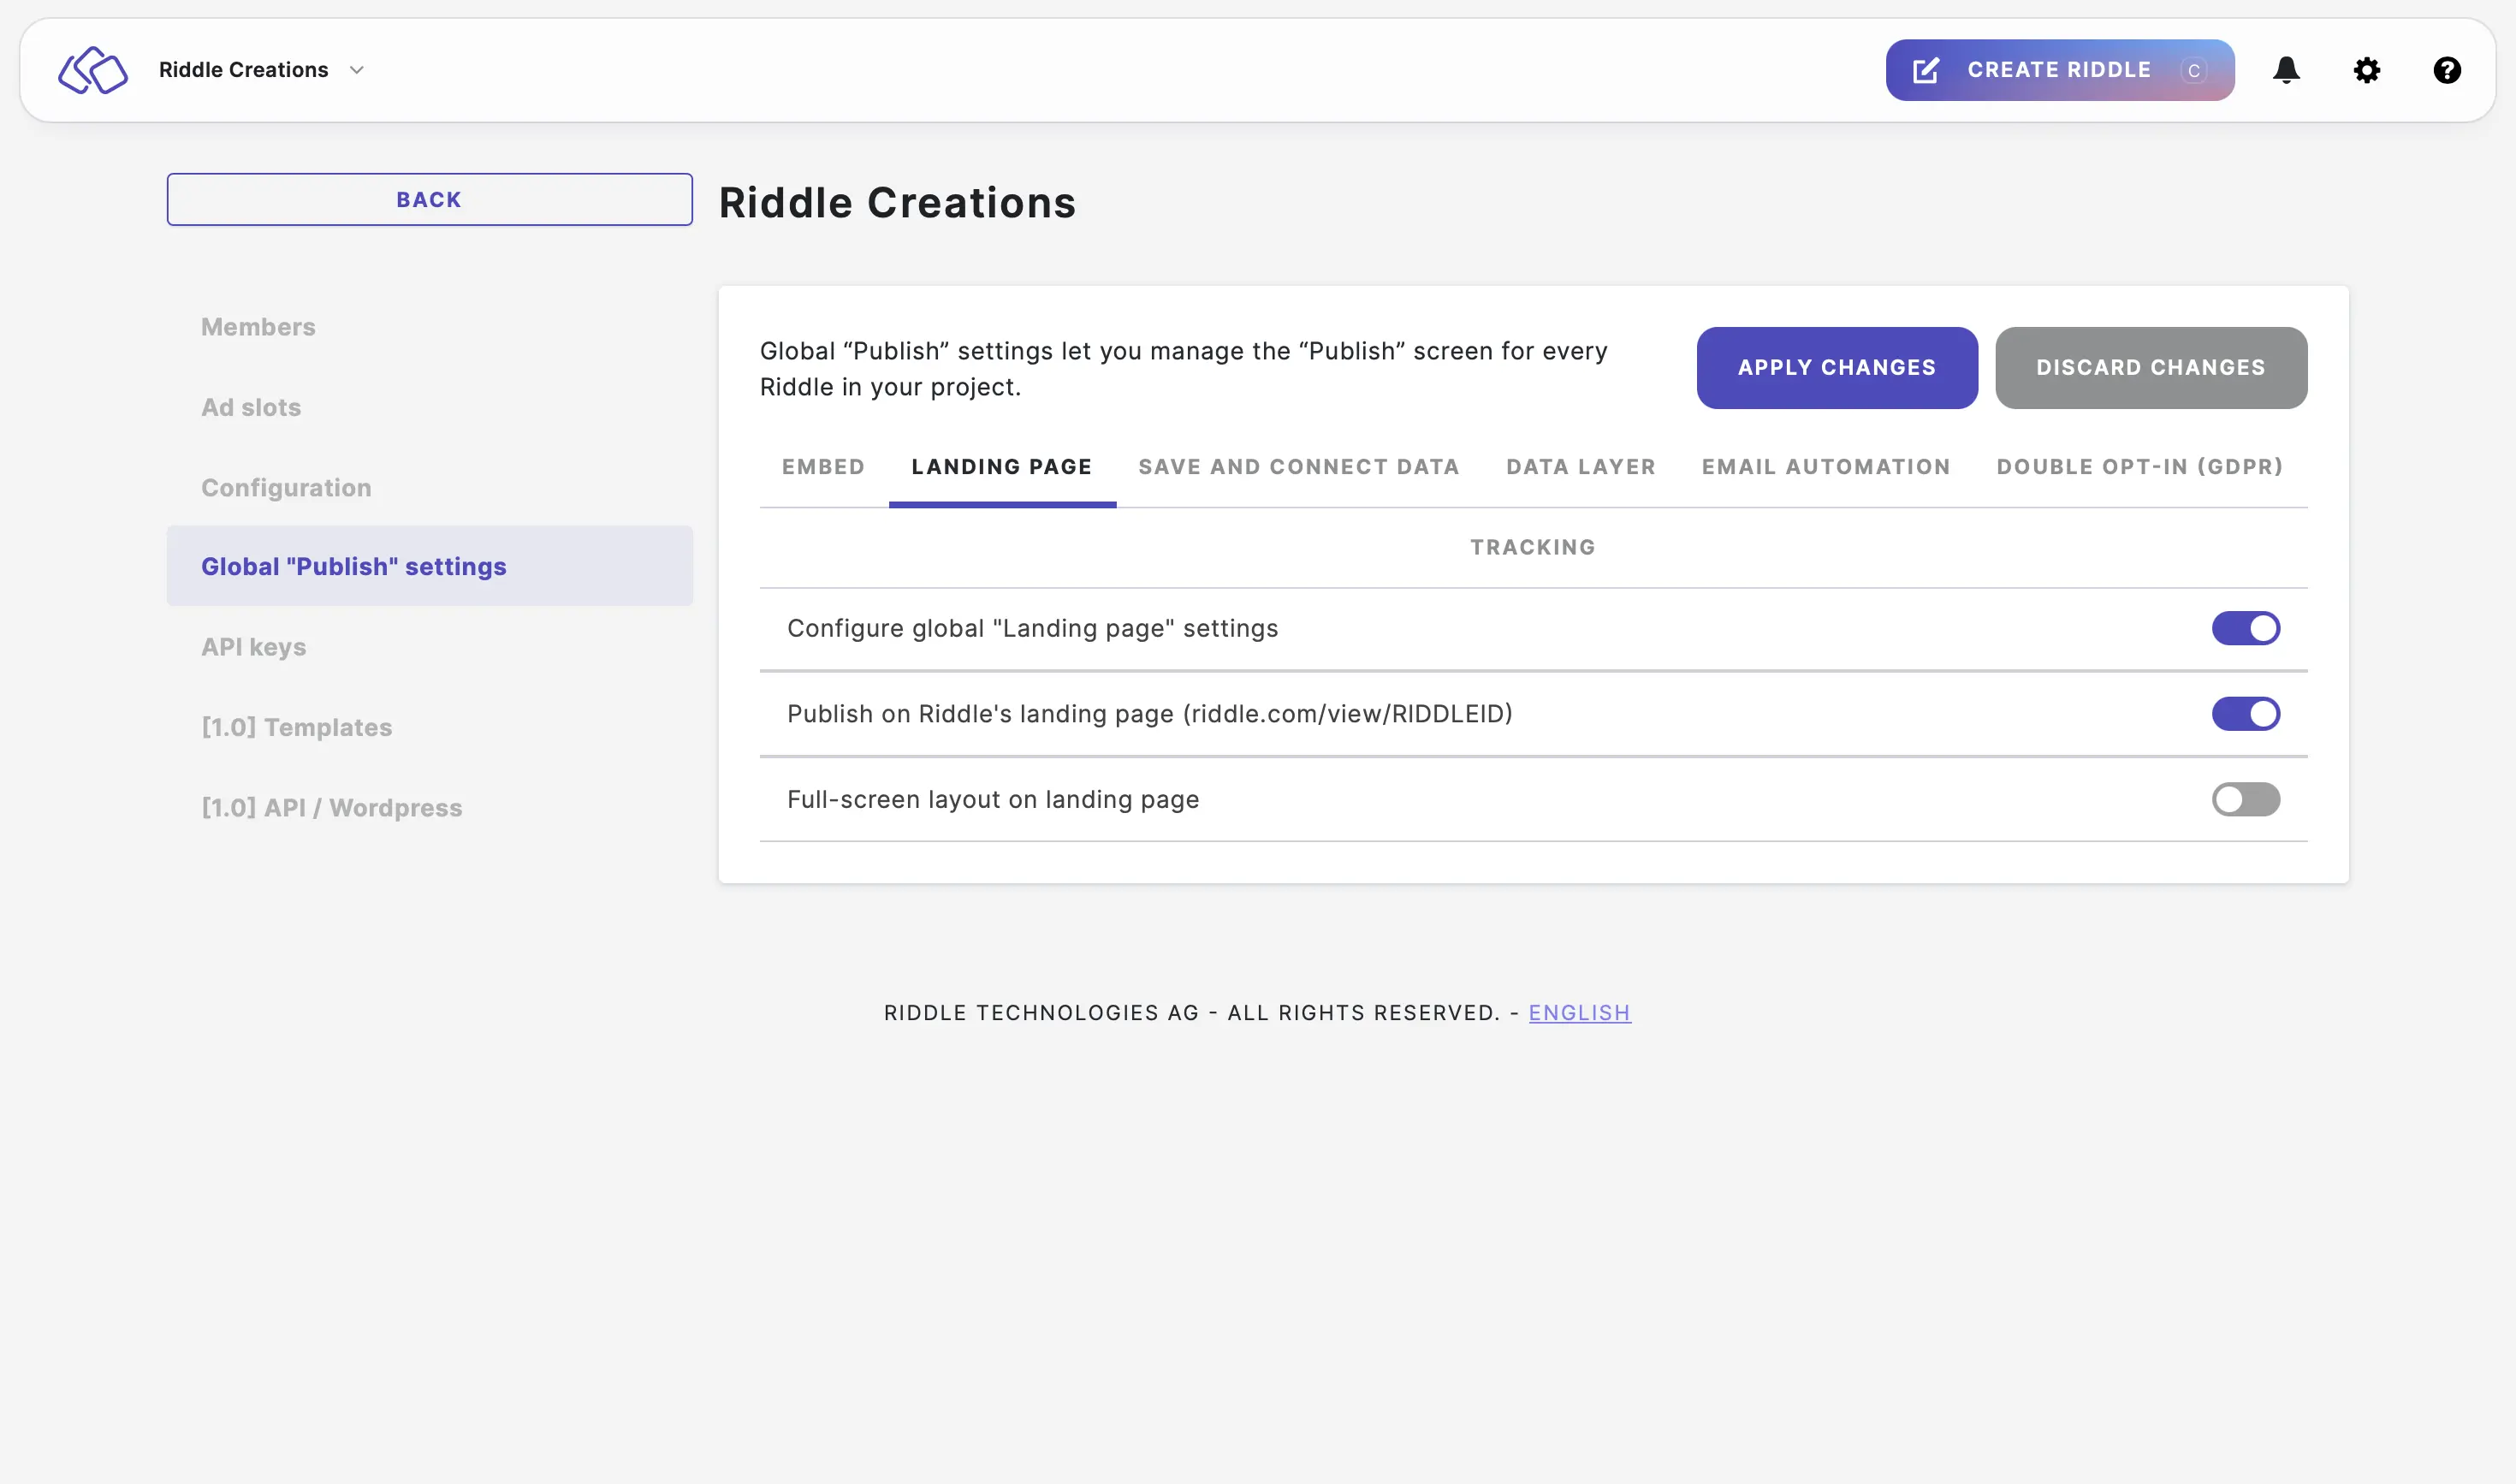
- Enable Full-screen layout on landing page to make the landing page versions of Riddles appear in full-screen view.
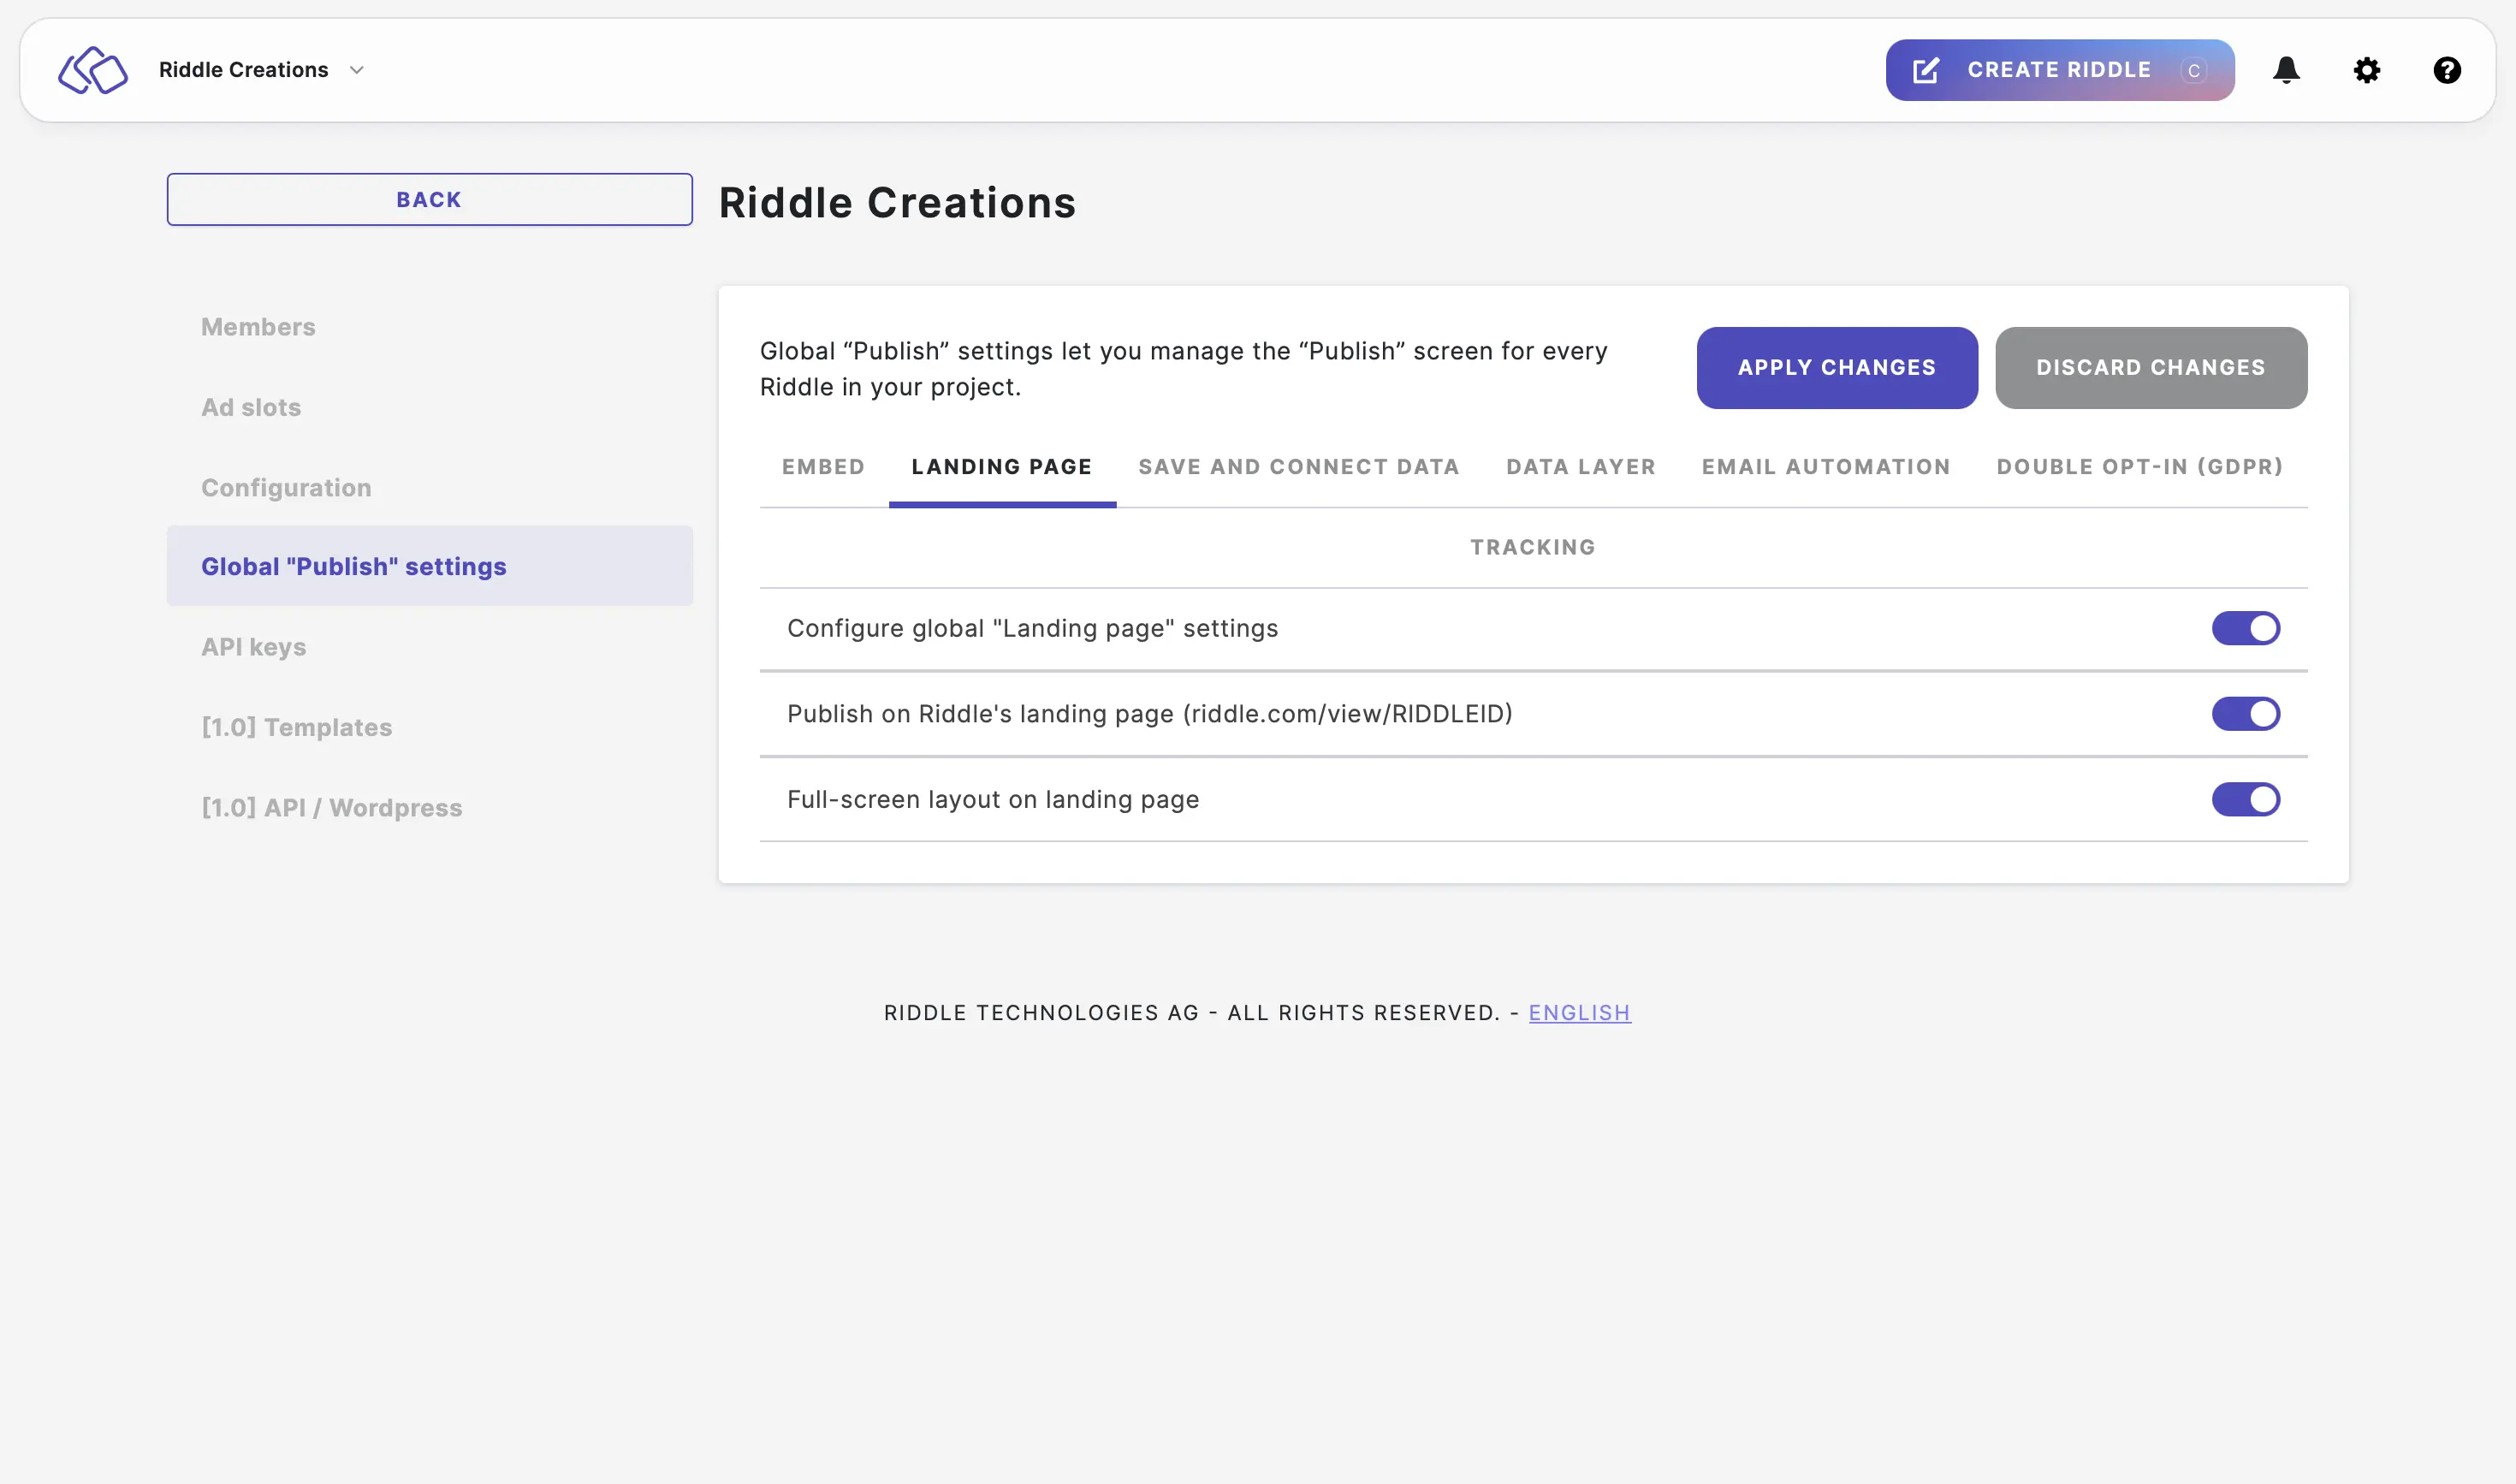
- Click on APPLY CHANGES or continue making other changes. Applying the settings can take up to five minutes.
Configure project save and connect data settings
- Go to the main menu in the top right corner and click on Your projects under COLLABORATION.
- Click on one of your projects.
- Click on Global "Publish" settings > SAVE AND CONNECT DATA and then enable Configure "Save and connect data" settings. Save and connect data will then be enabled by default.
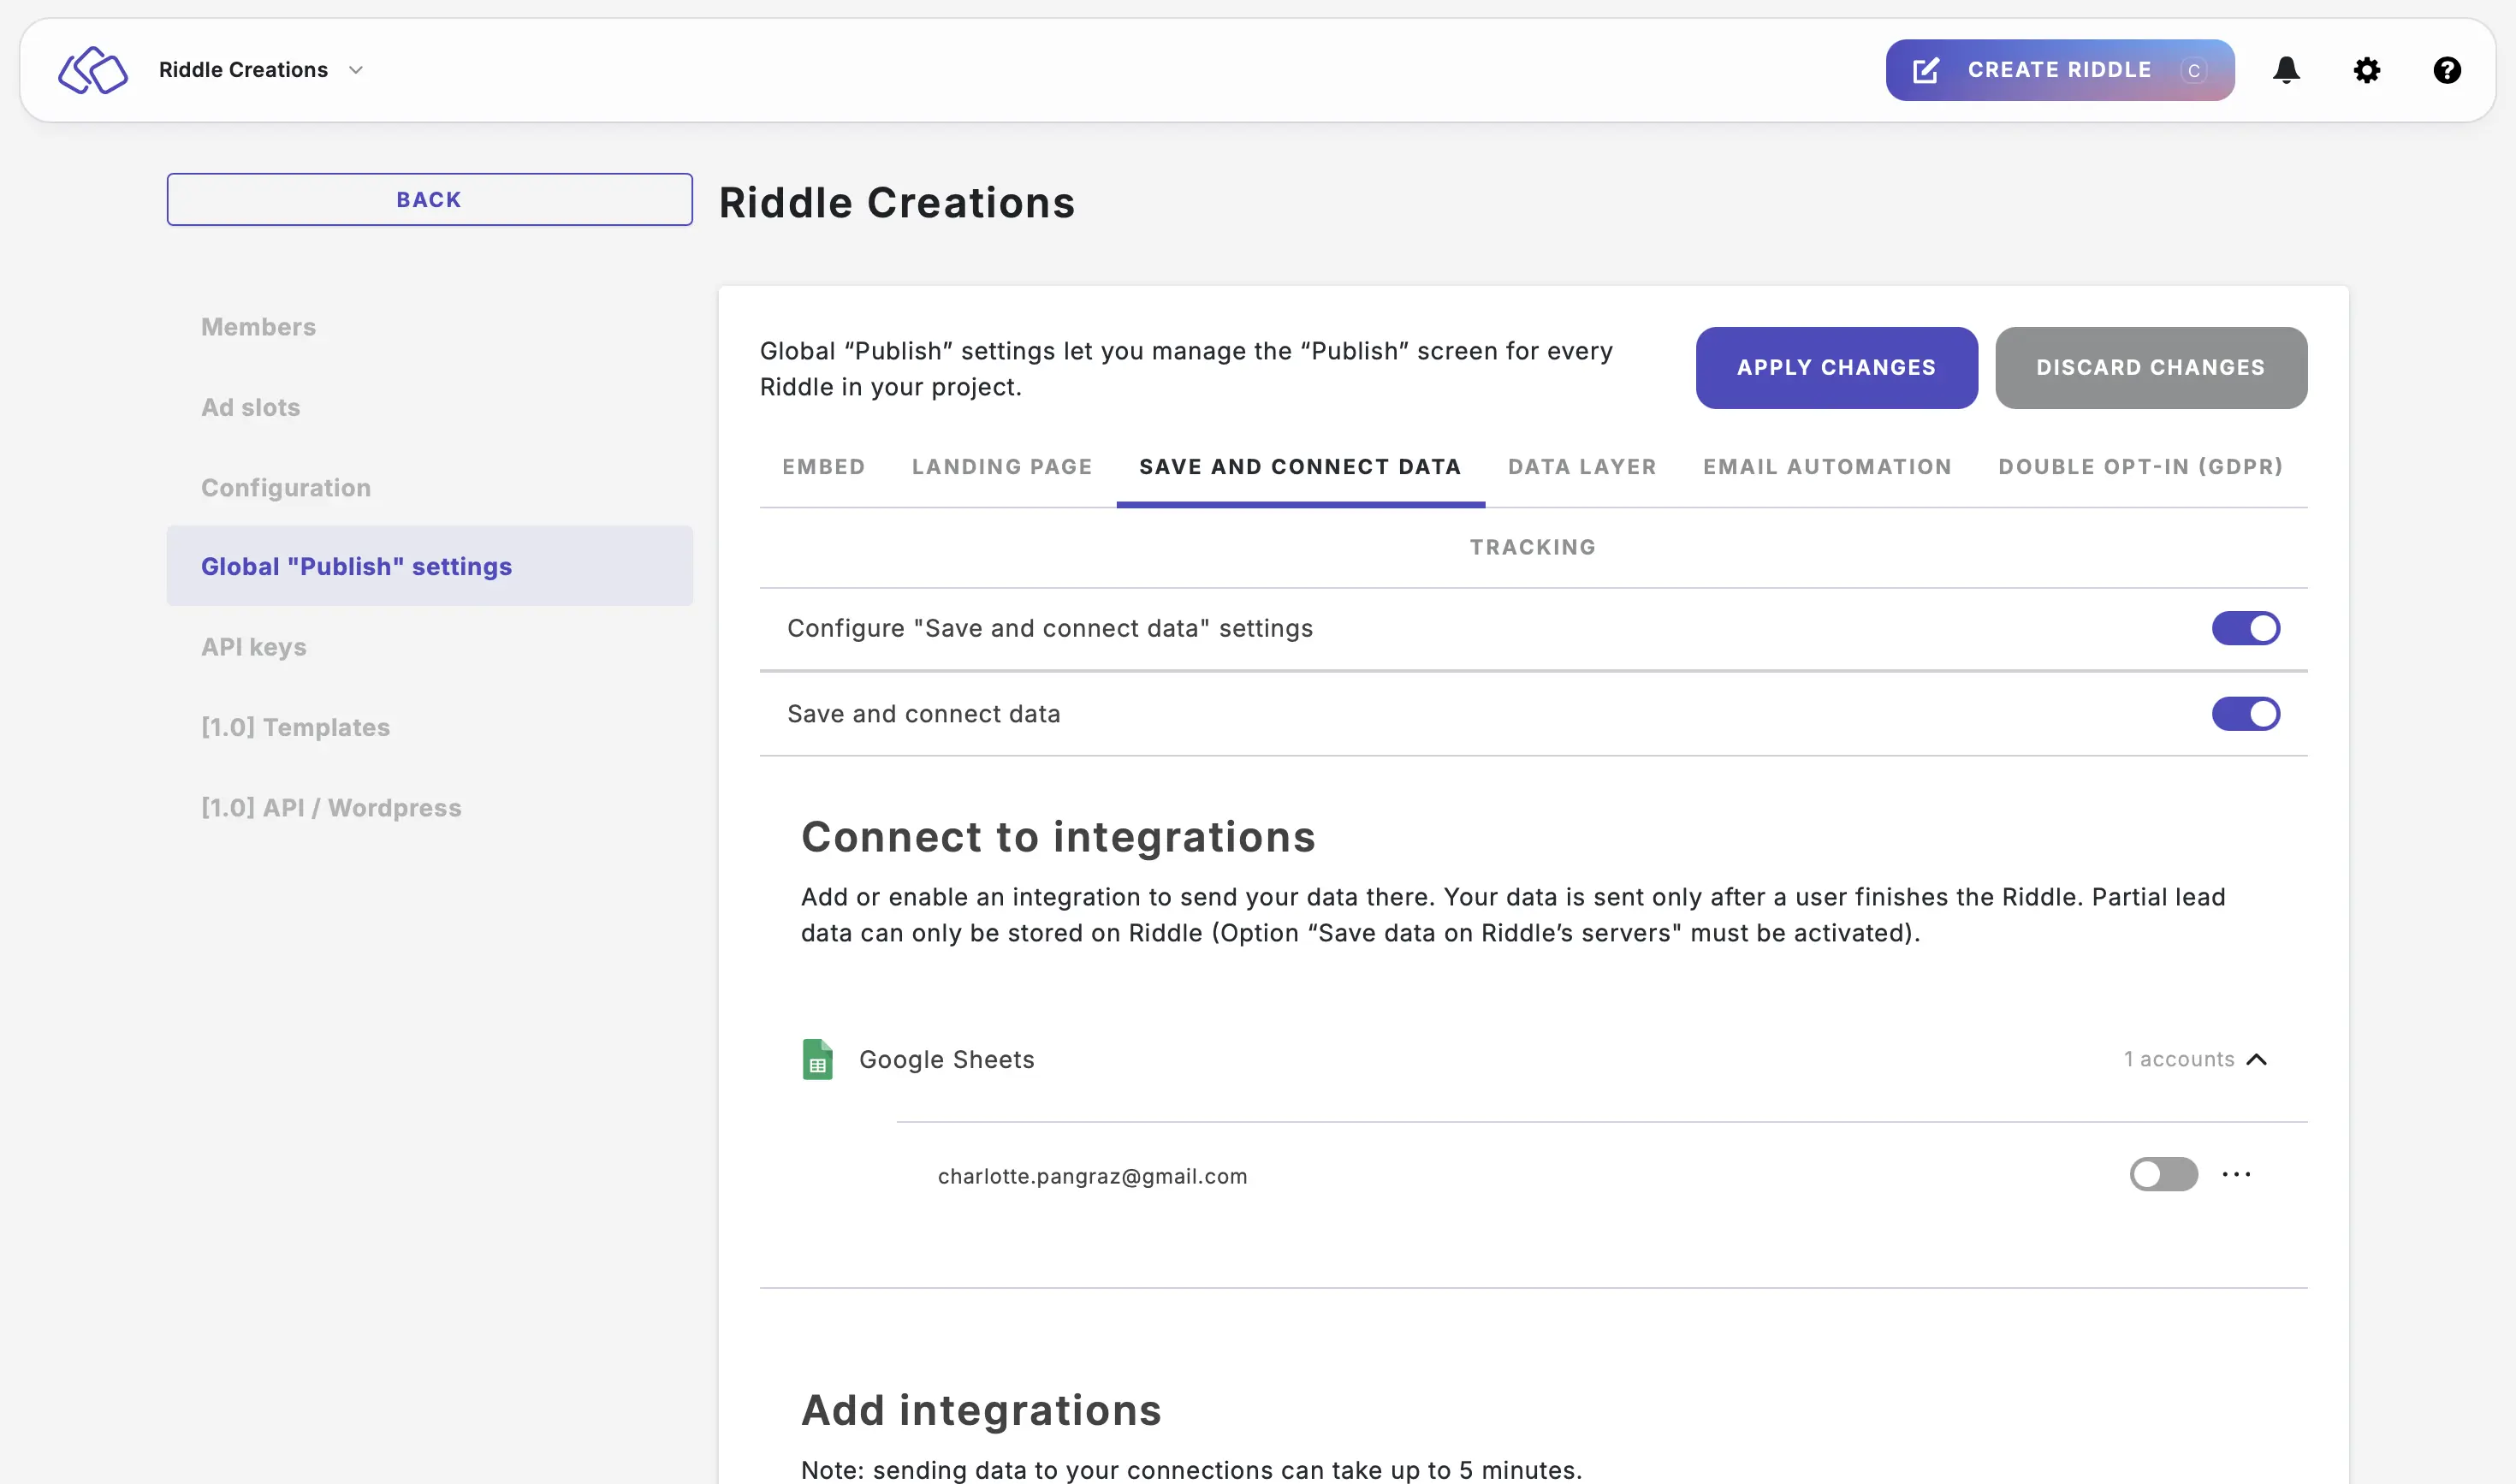
- Set up any integration you like under Connect to integrations or add an integration under Add integrations.
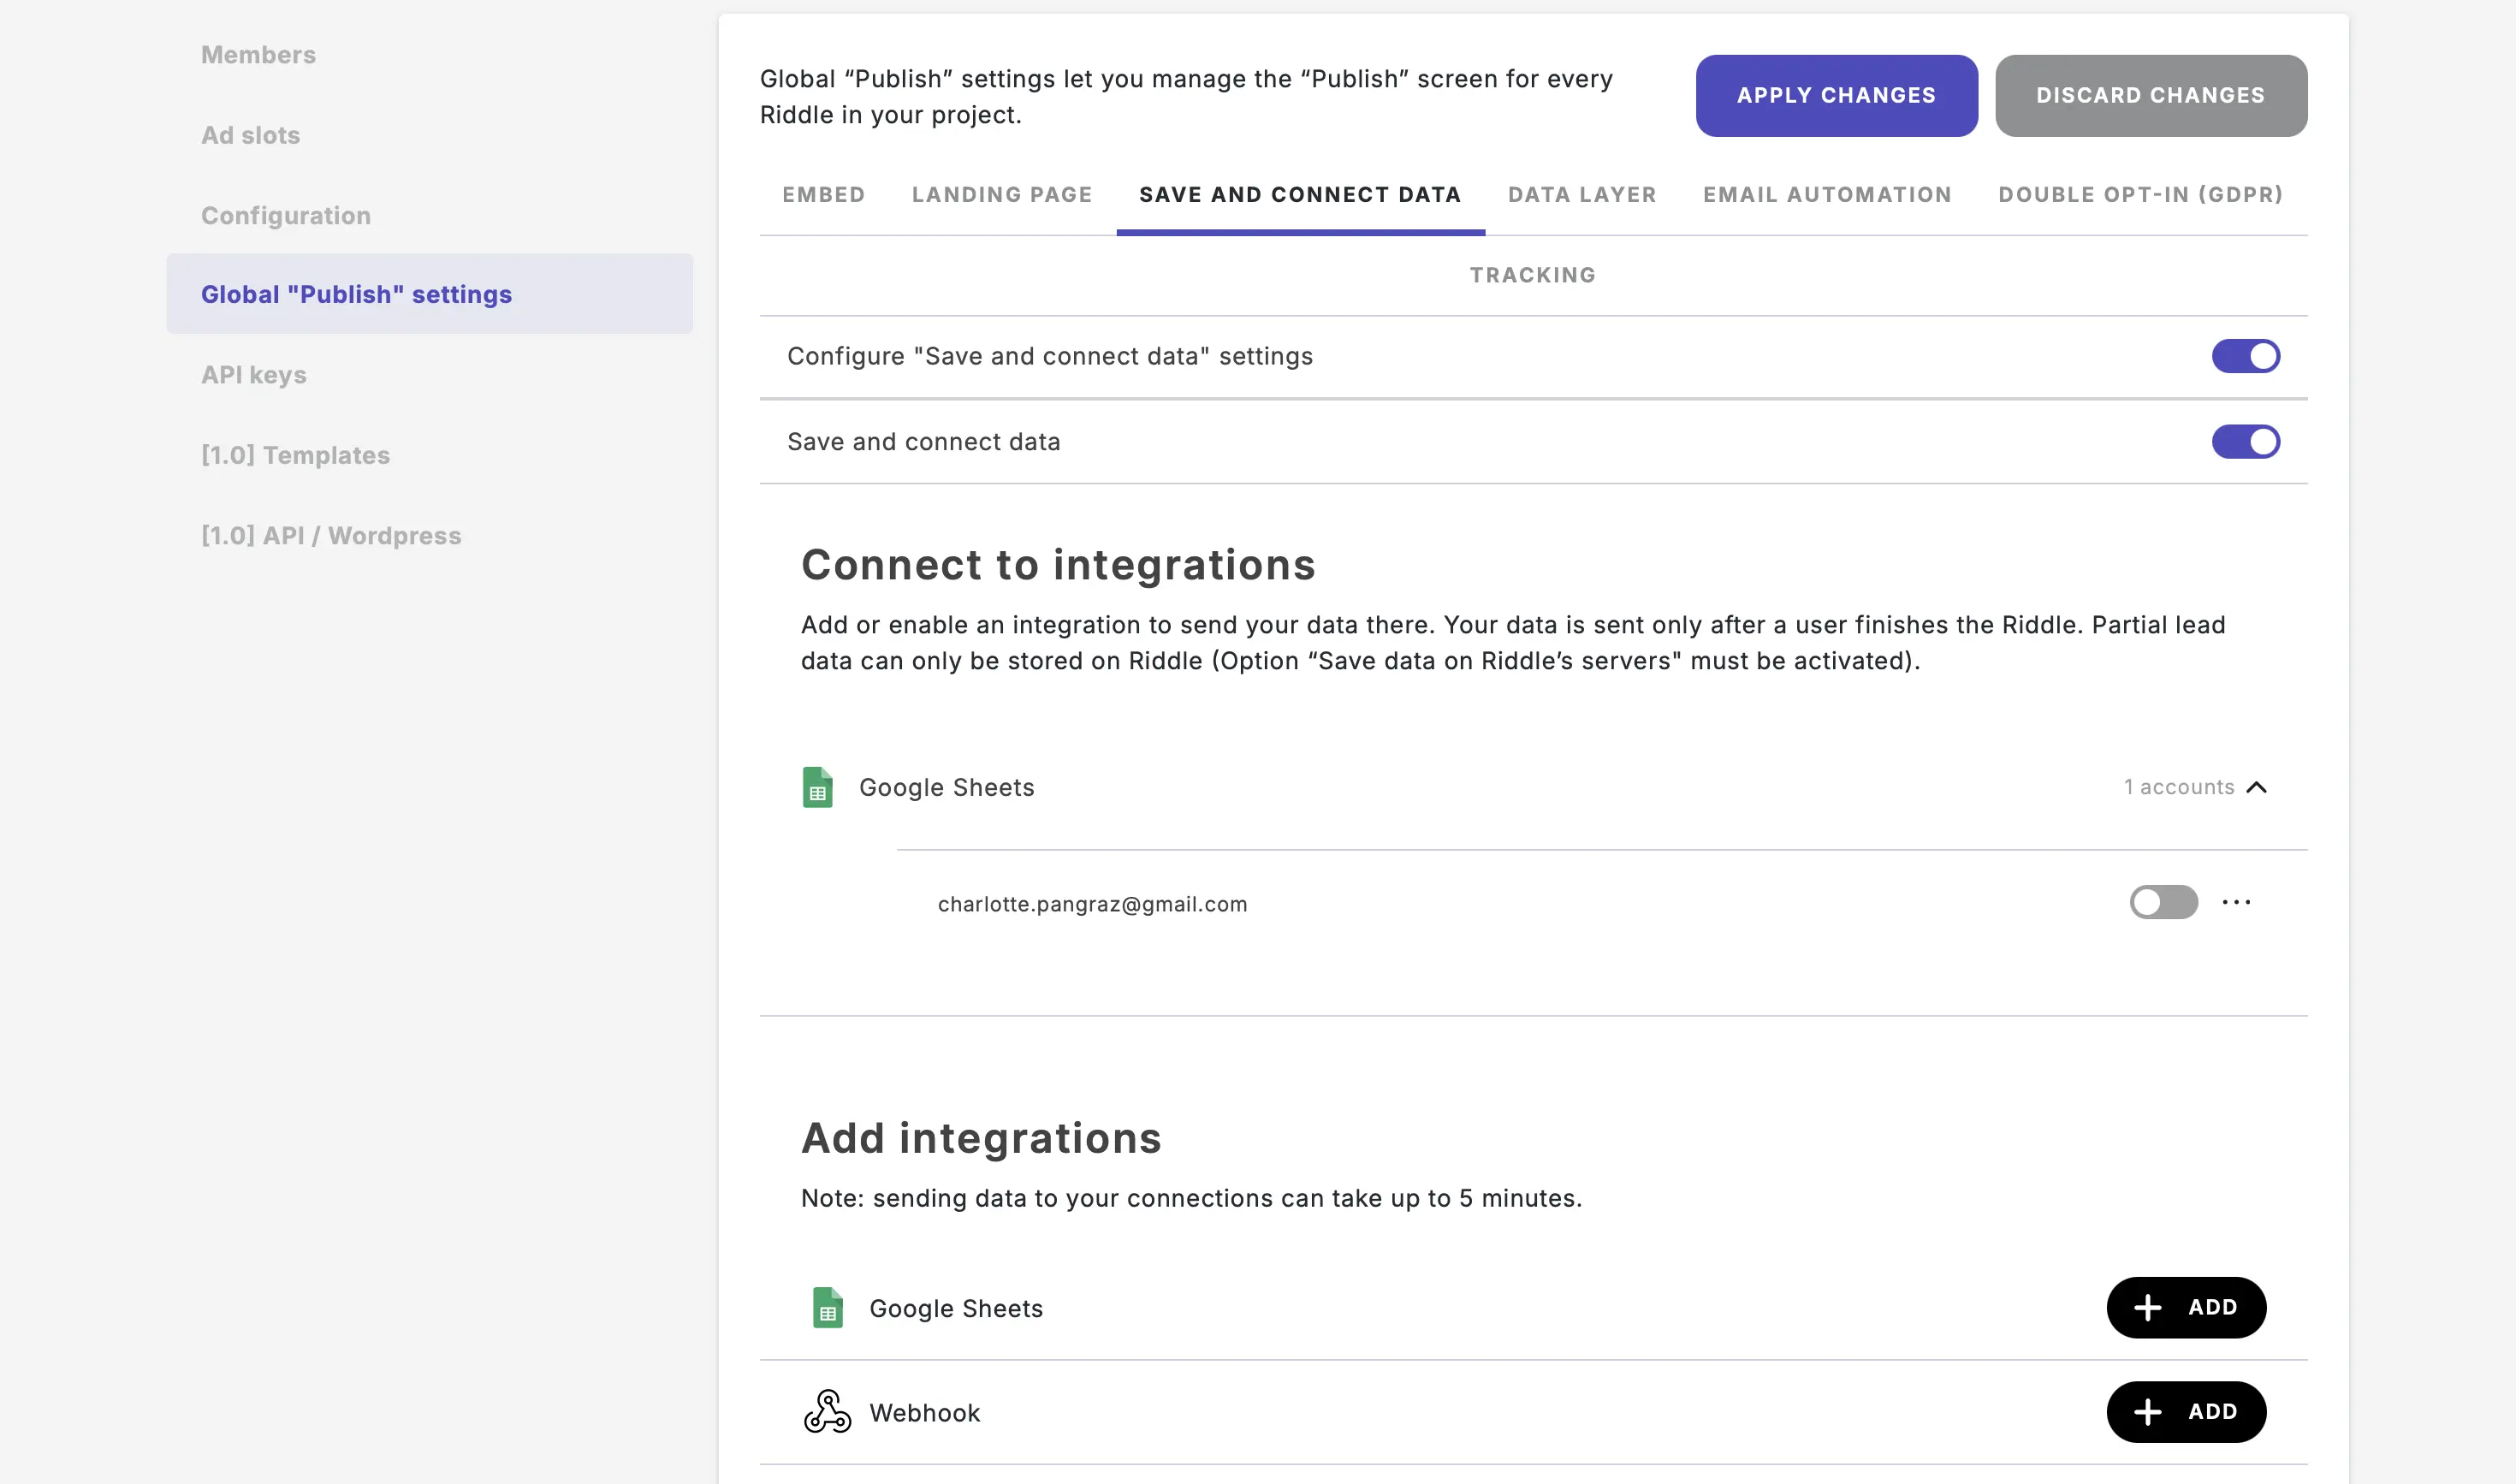
- Click on APPLY CHANGES or continue making other changes. Applying the settings can take up to five minutes.
Configure project data layer settings
- Go to the main menu in the top right corner and click on Your projects under COLLABORATION.
- Click on one of your projects.
- Click on Global "Publish" settings > DATA LAYER and then enable Configure "Data layer" settings and add data layer items by clicking on ADD ITEM.
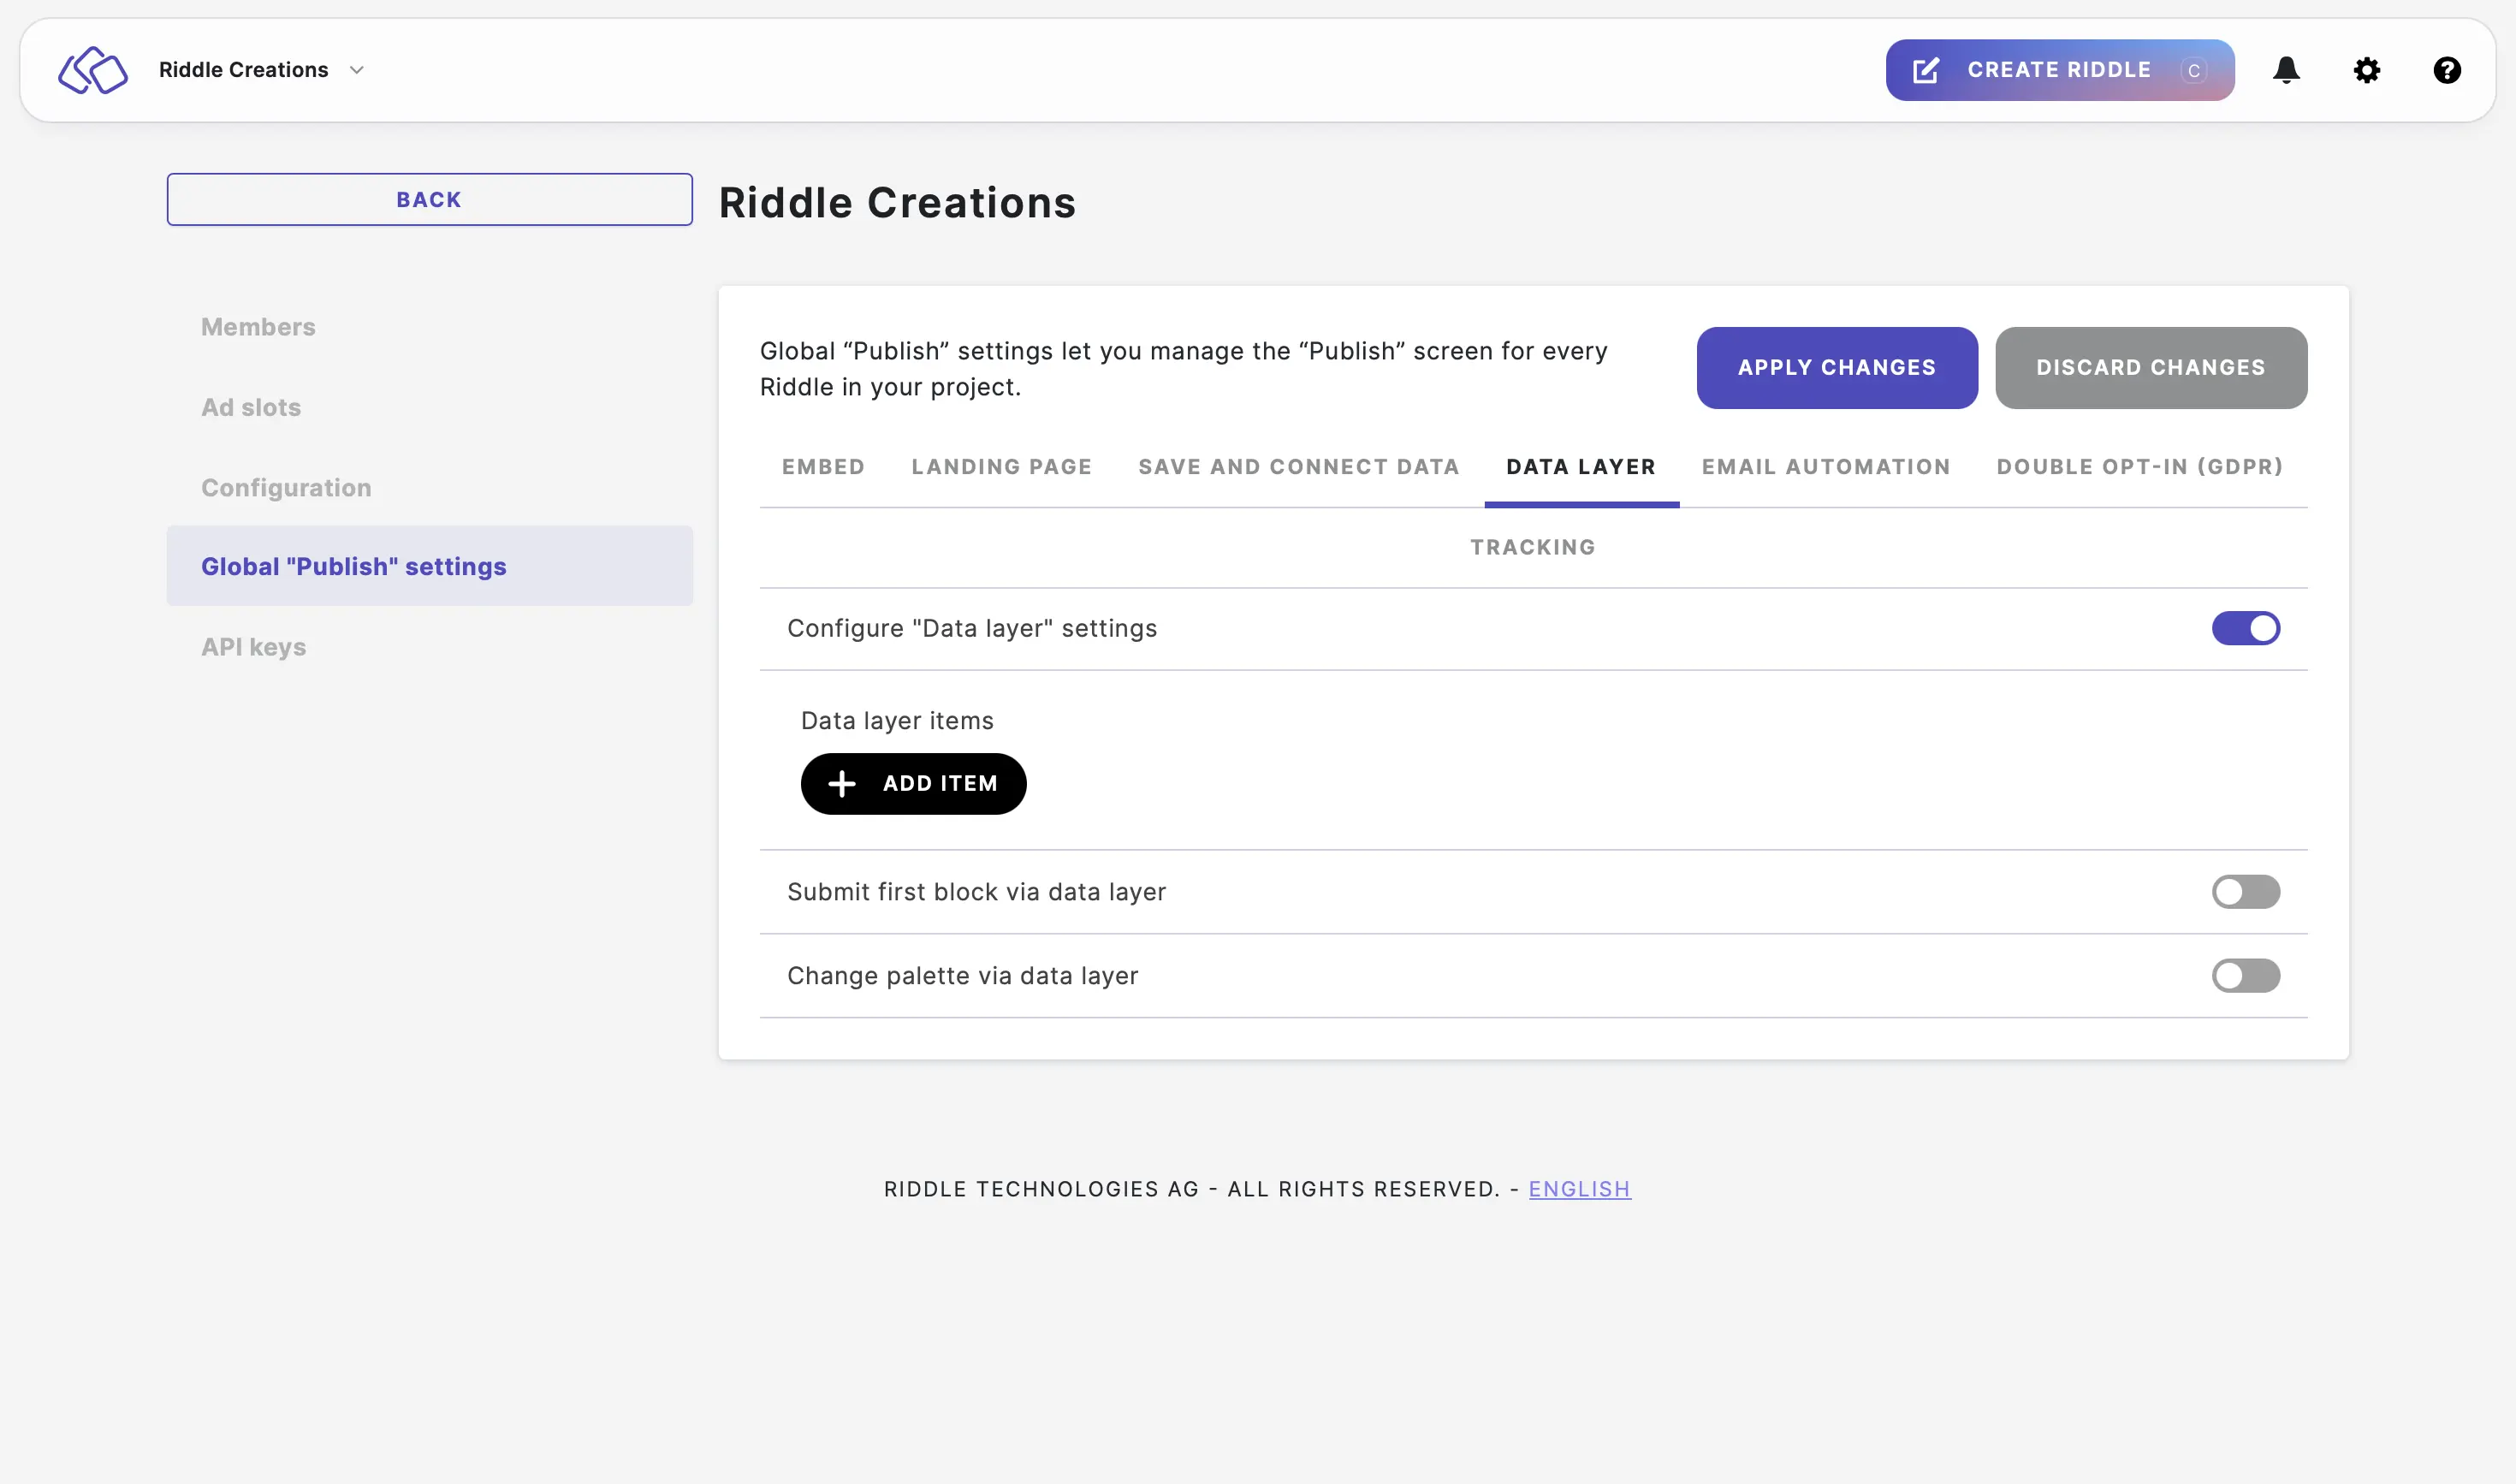
- Enable Submit first block via data layer to allow your audience to submit their answer to the first question, which, once clicked, will then be saved as an answer via the data layer.
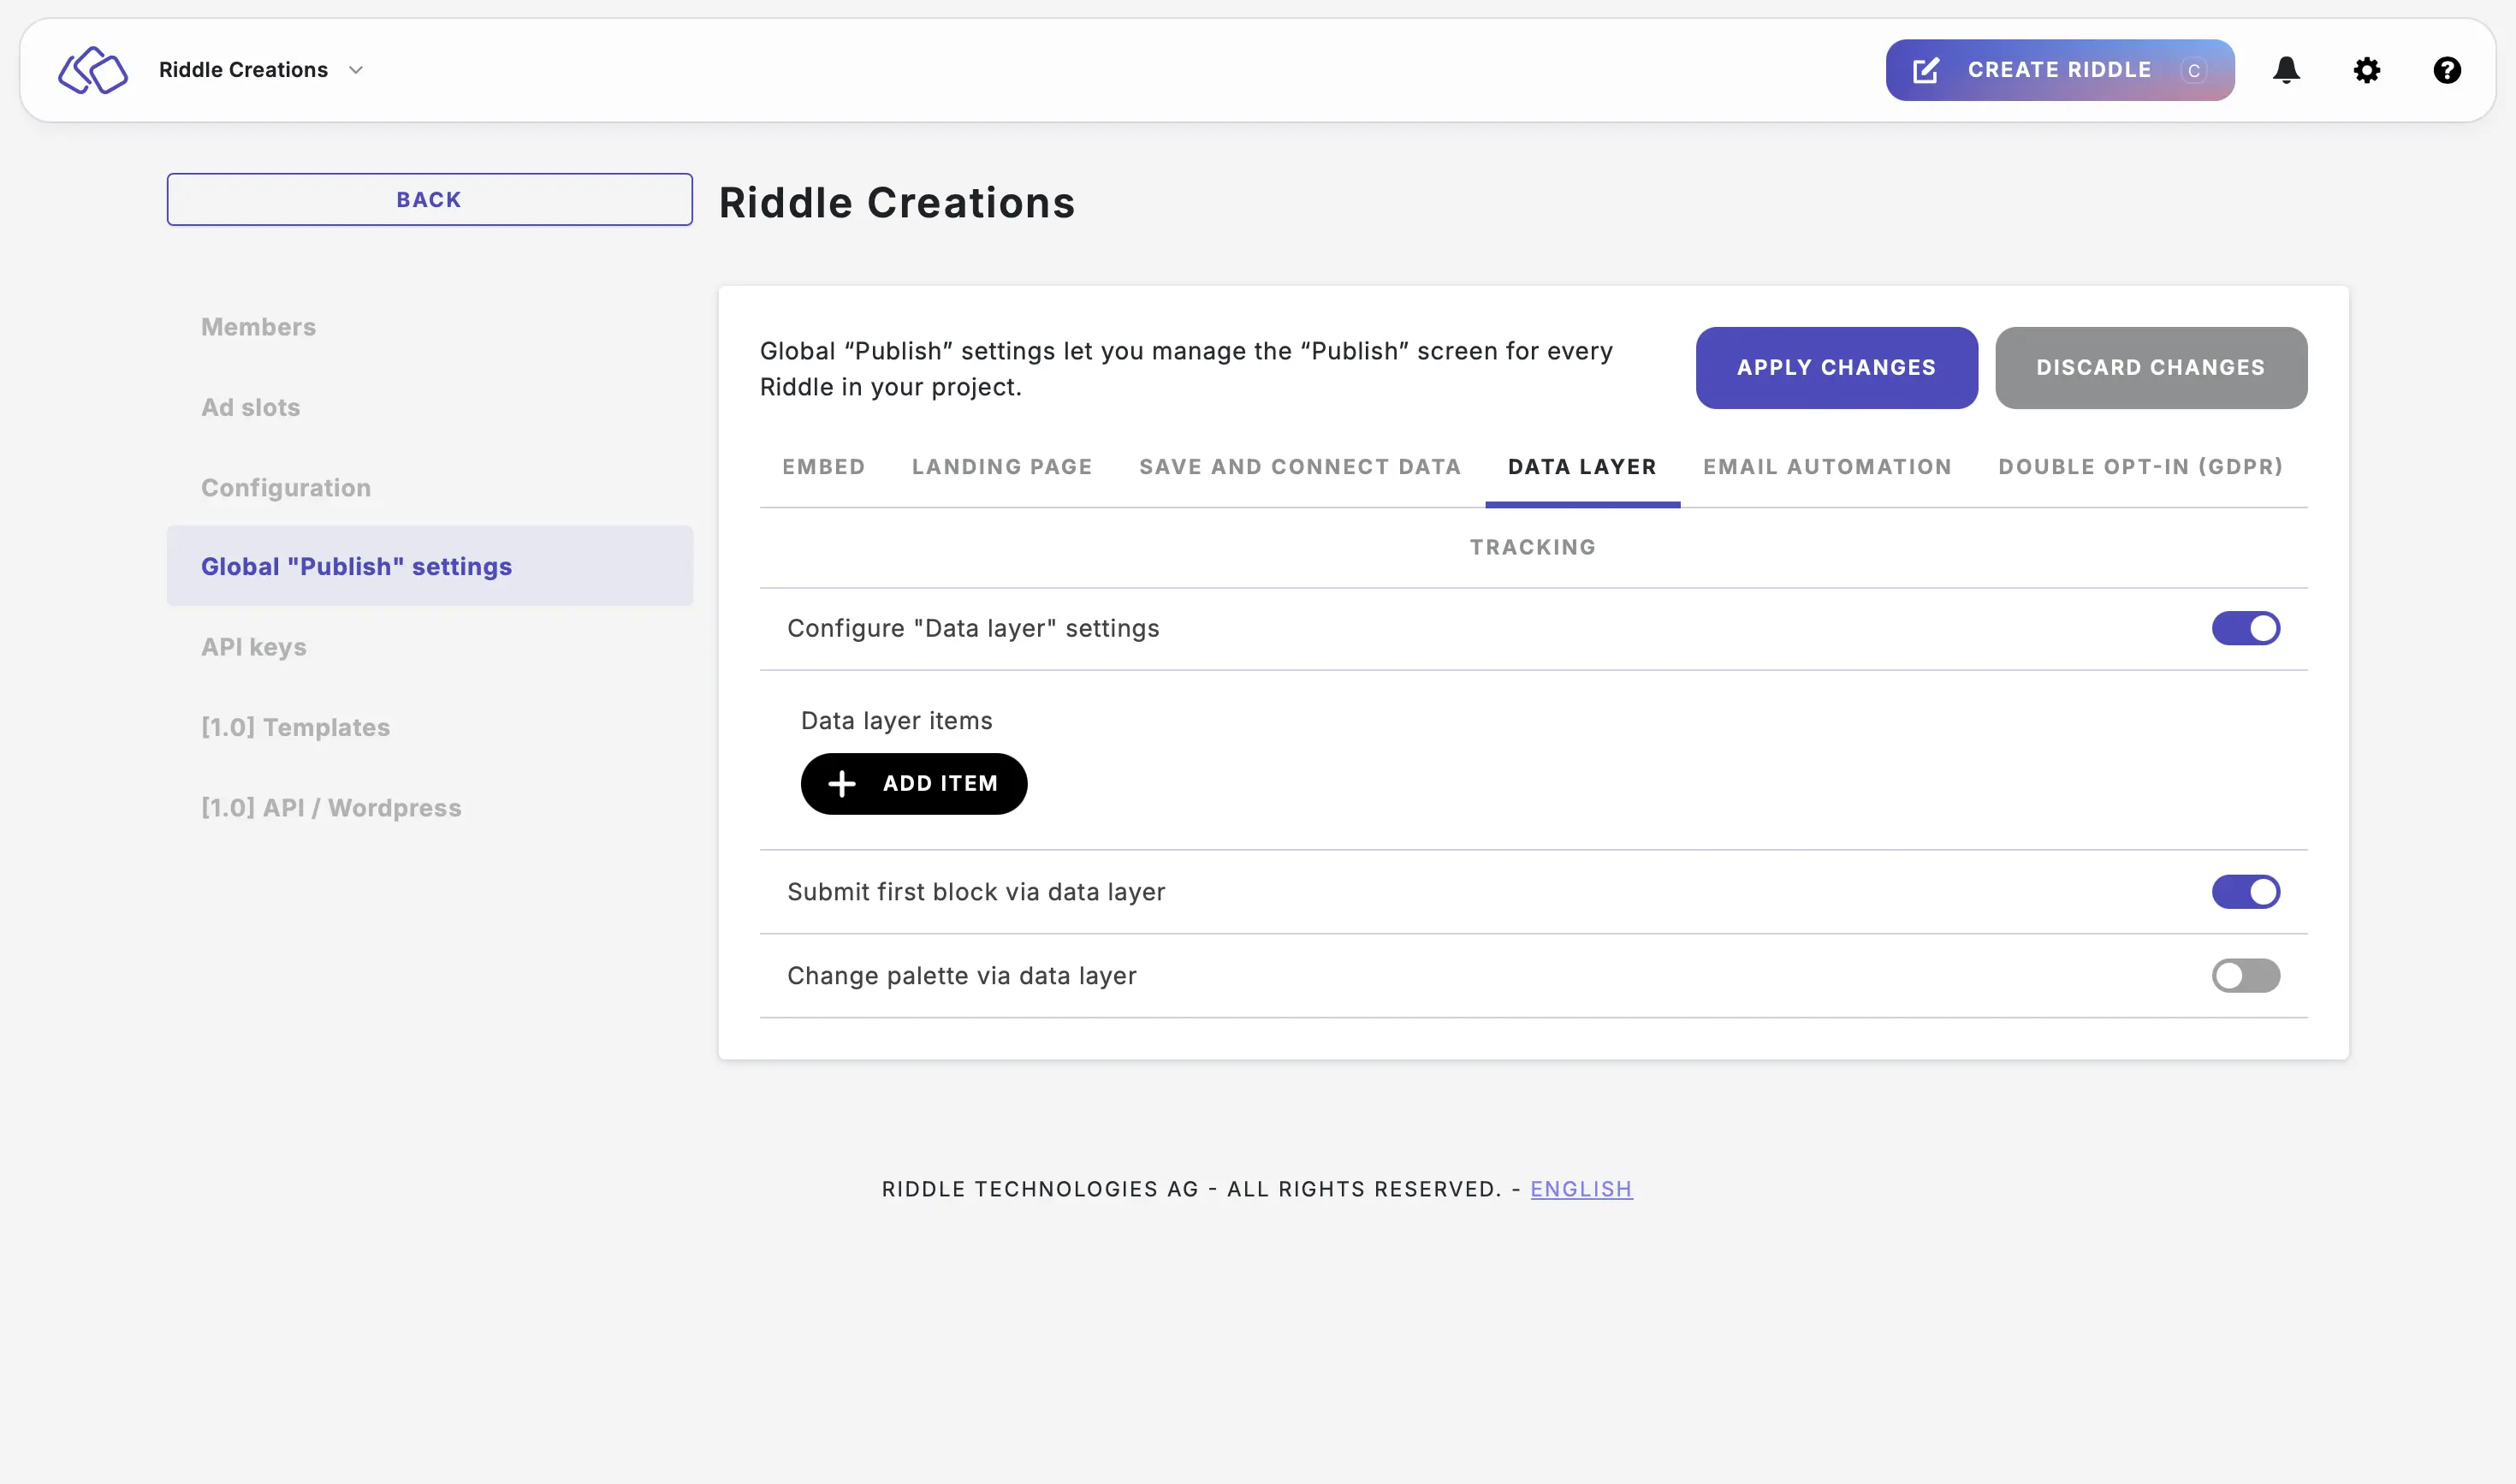
- Enable Change palette via data layer to change the palette via the data layer.

- Click on APPLY CHANGES or continue making other changes. Applying the settings can take up to five minutes.
Configure project email automation settings
- Go to the main menu in the top right corner and click on Your projects under COLLABORATION.
- Click on one of your projects.
- Click on Global "Publish" settings > EMAIL AUTOMATION and then enable Configure "Email automation" settings.
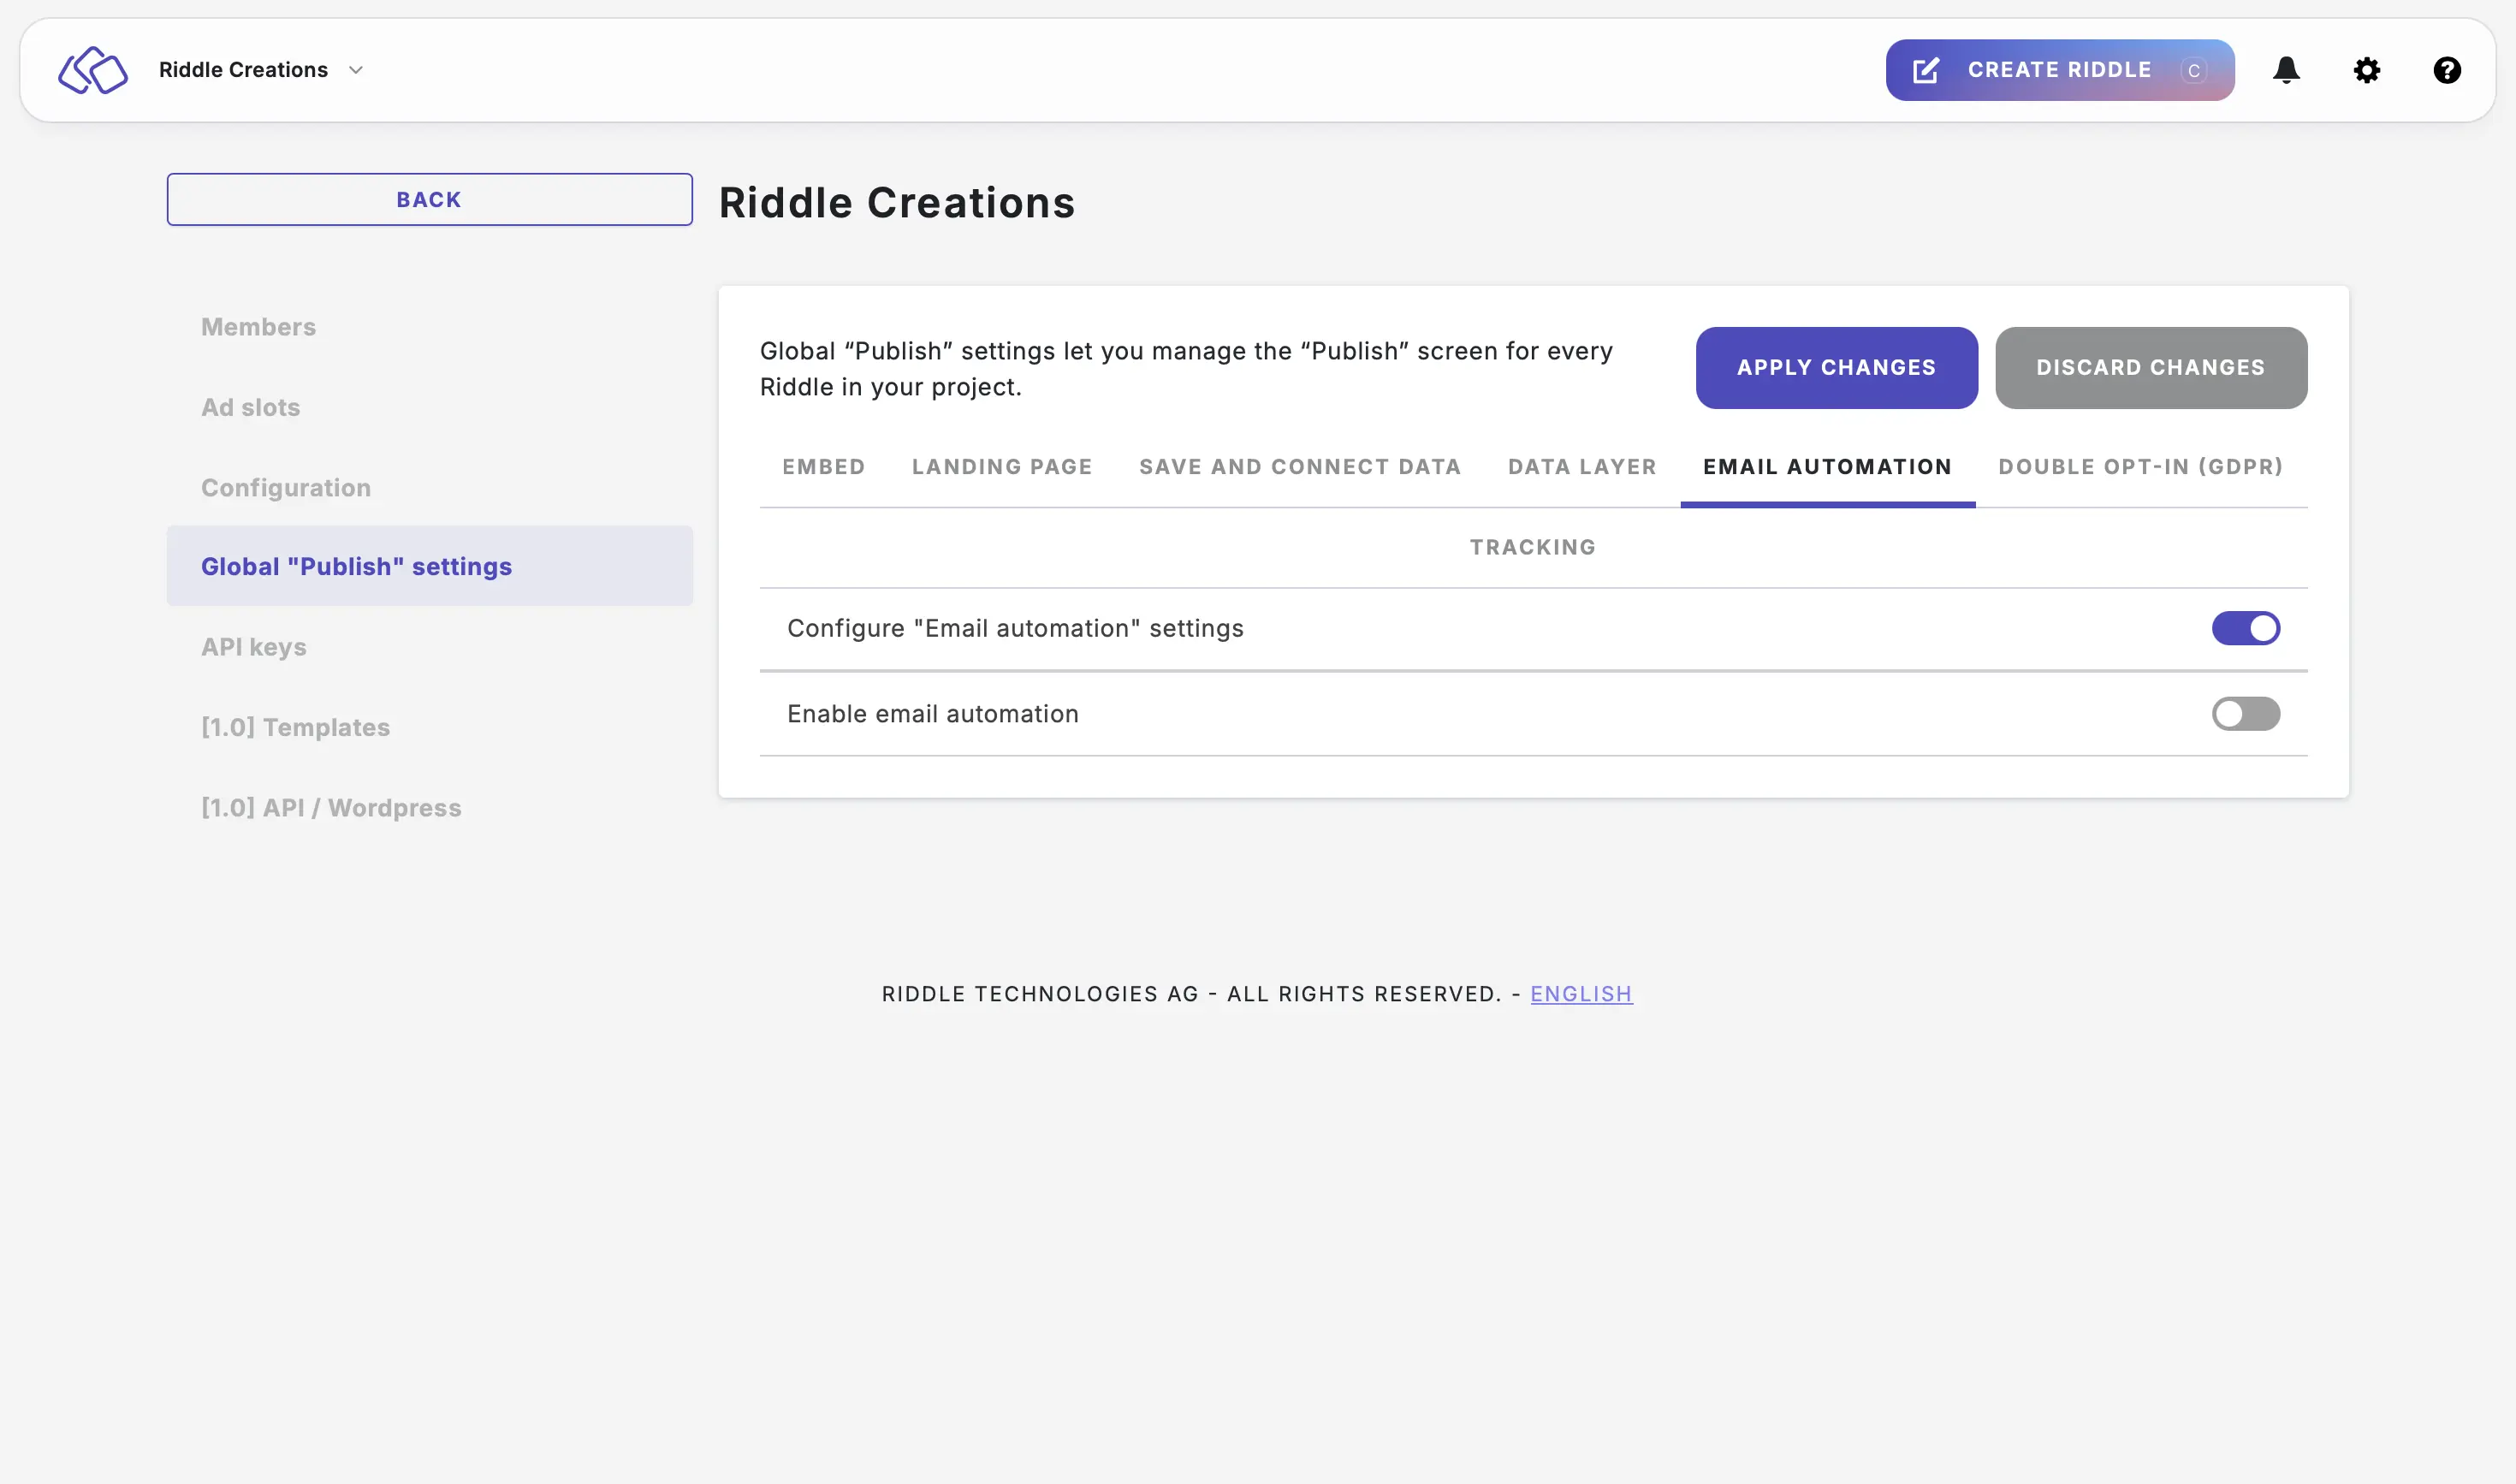
- Enable Enable emal automation, and add your SMTP (optional).

- Click on APPLY CHANGES. Applying the settings can take up to five minutes.
Configure project double opt-in settings
- Go to the main menu in the top right corner and click on Your projects under COLLABORATION.
- Click on one of your projects.
- Click on Global "Publish" settings > DOUBLE OPT-IN (GDPR) and then enable Configure "Double opt-in (GDPR)" settings.

- Enable one of the following double opt-in methods:
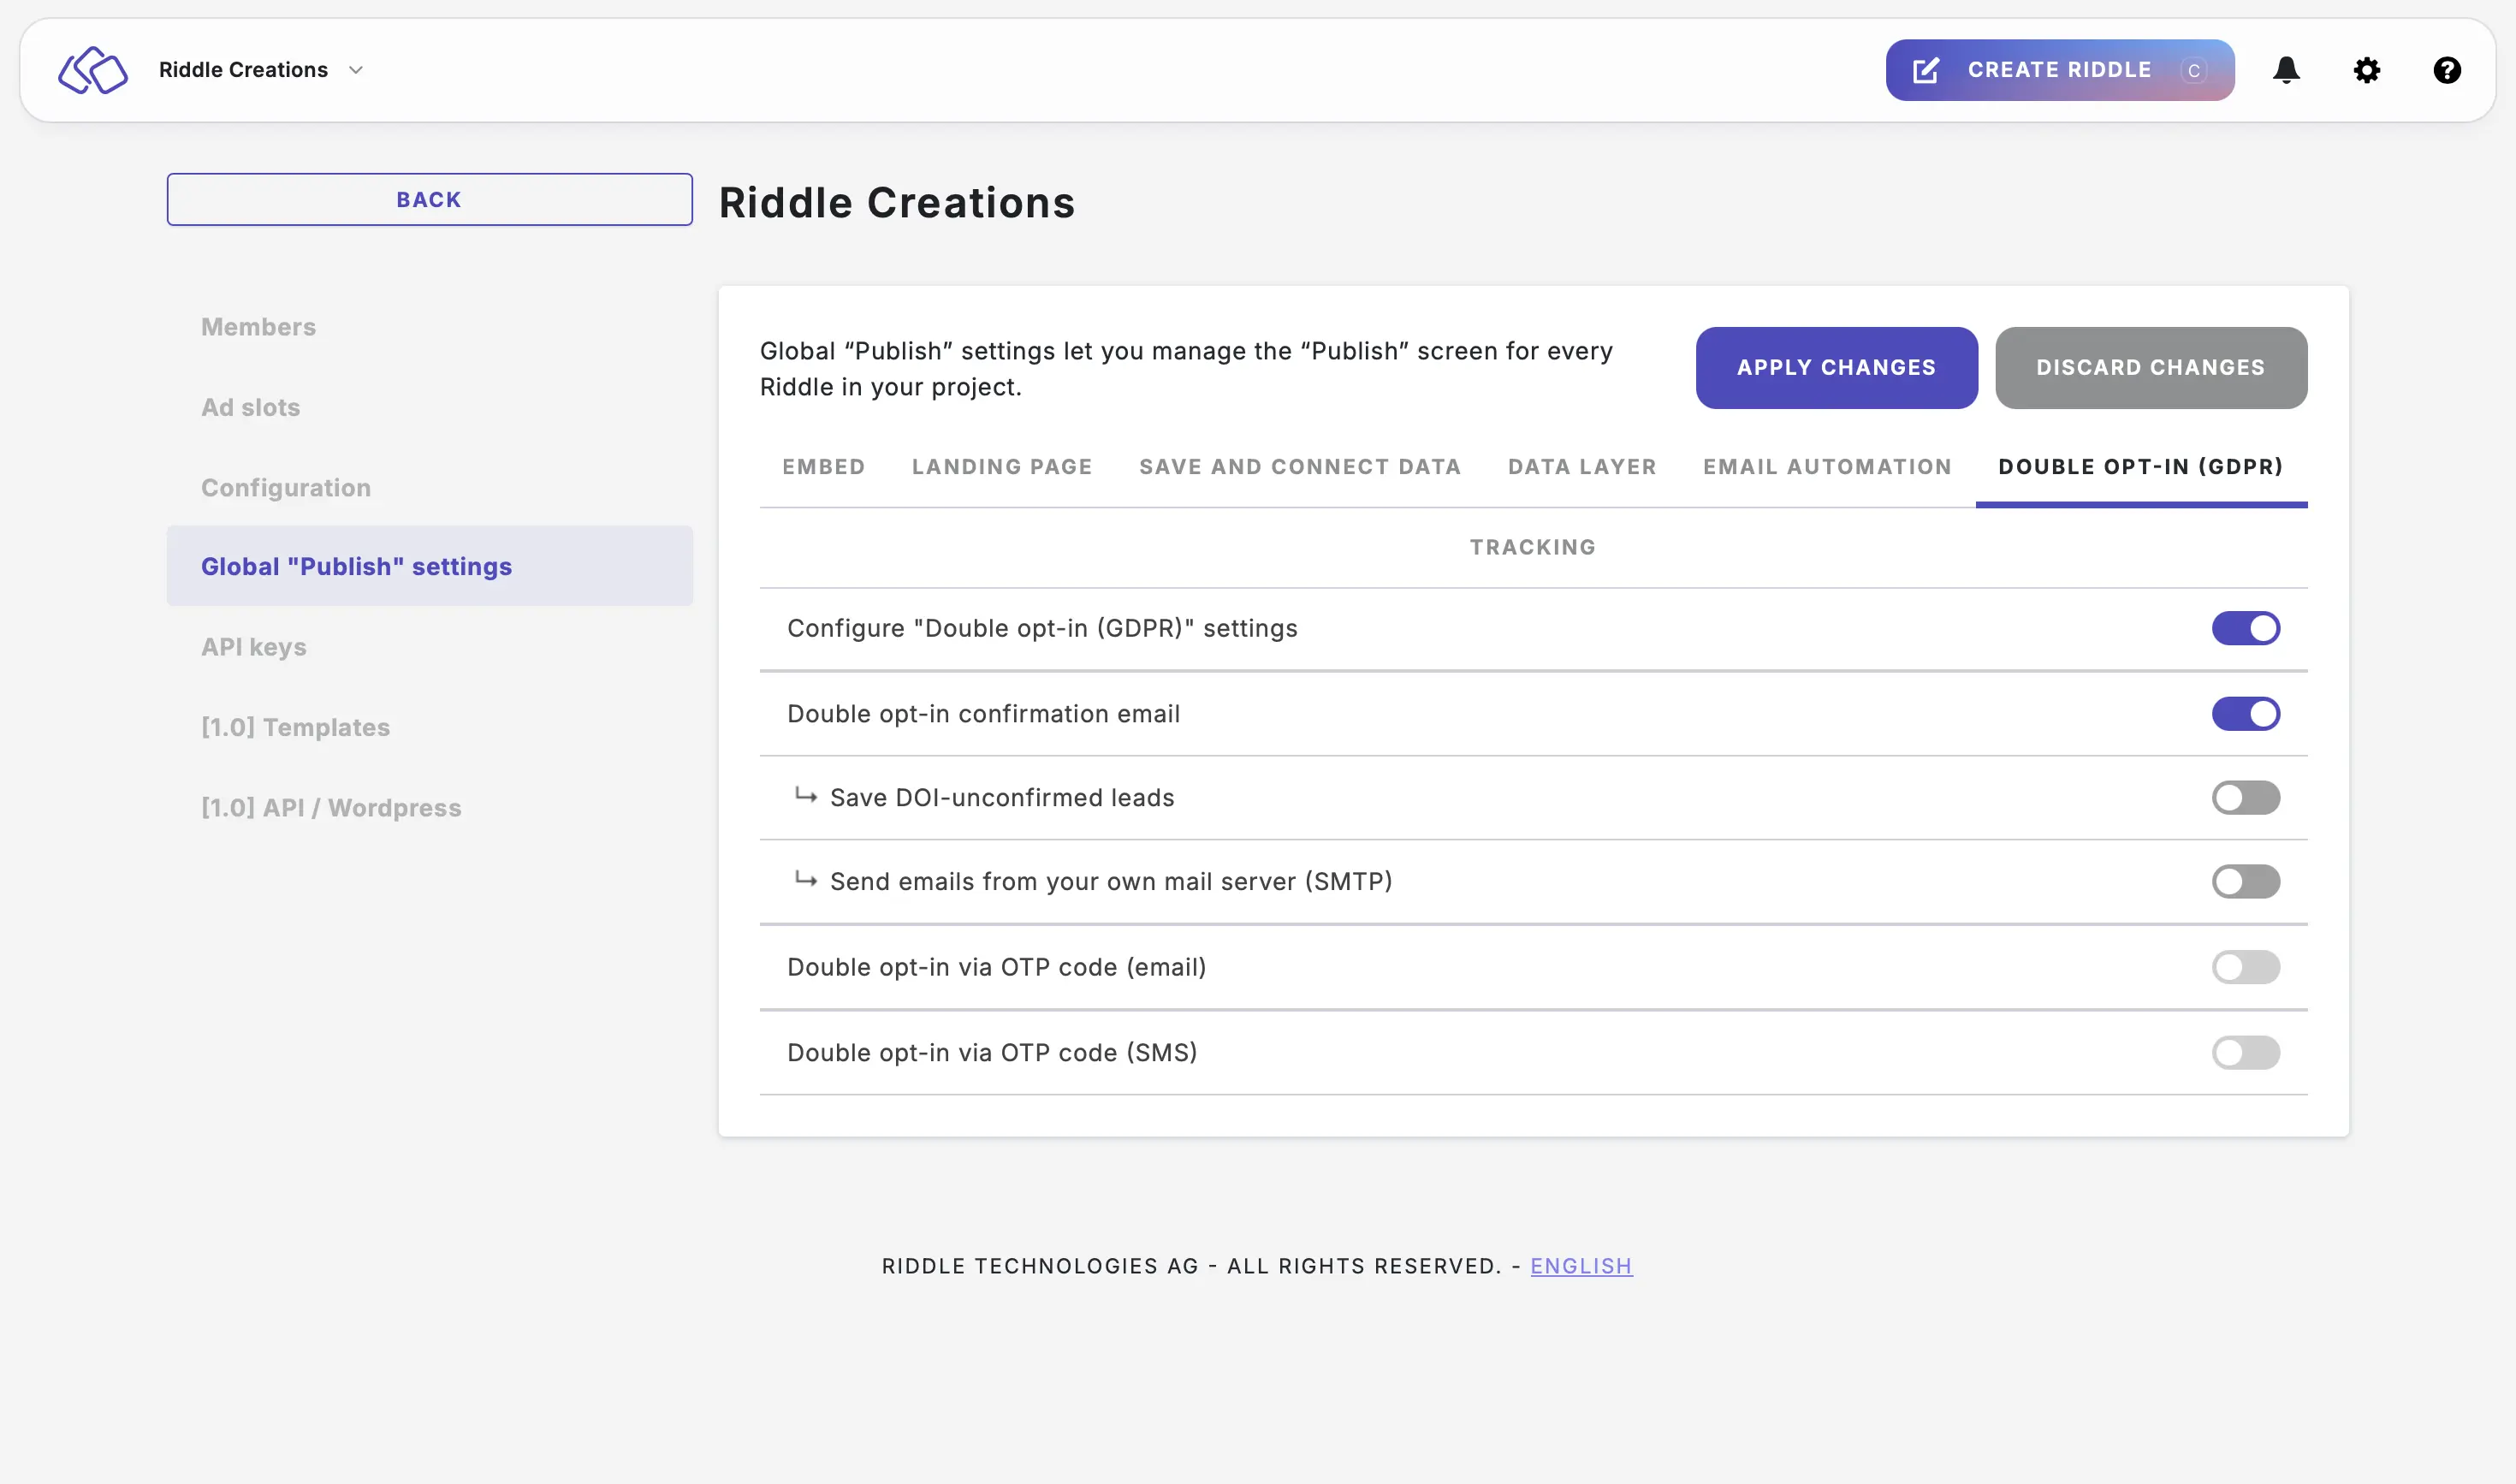
- Double opt-in confirmation email (and enable Save DOI-unconfirmed leads to also save the leads that have not been confirmed yet)
- Double opt-in via OTP code (email)
- Double opt-in via OTP code (SMS)
- Click on APPLY CHANGES or continue making other changes. Applying the settings can take up to five minutes.
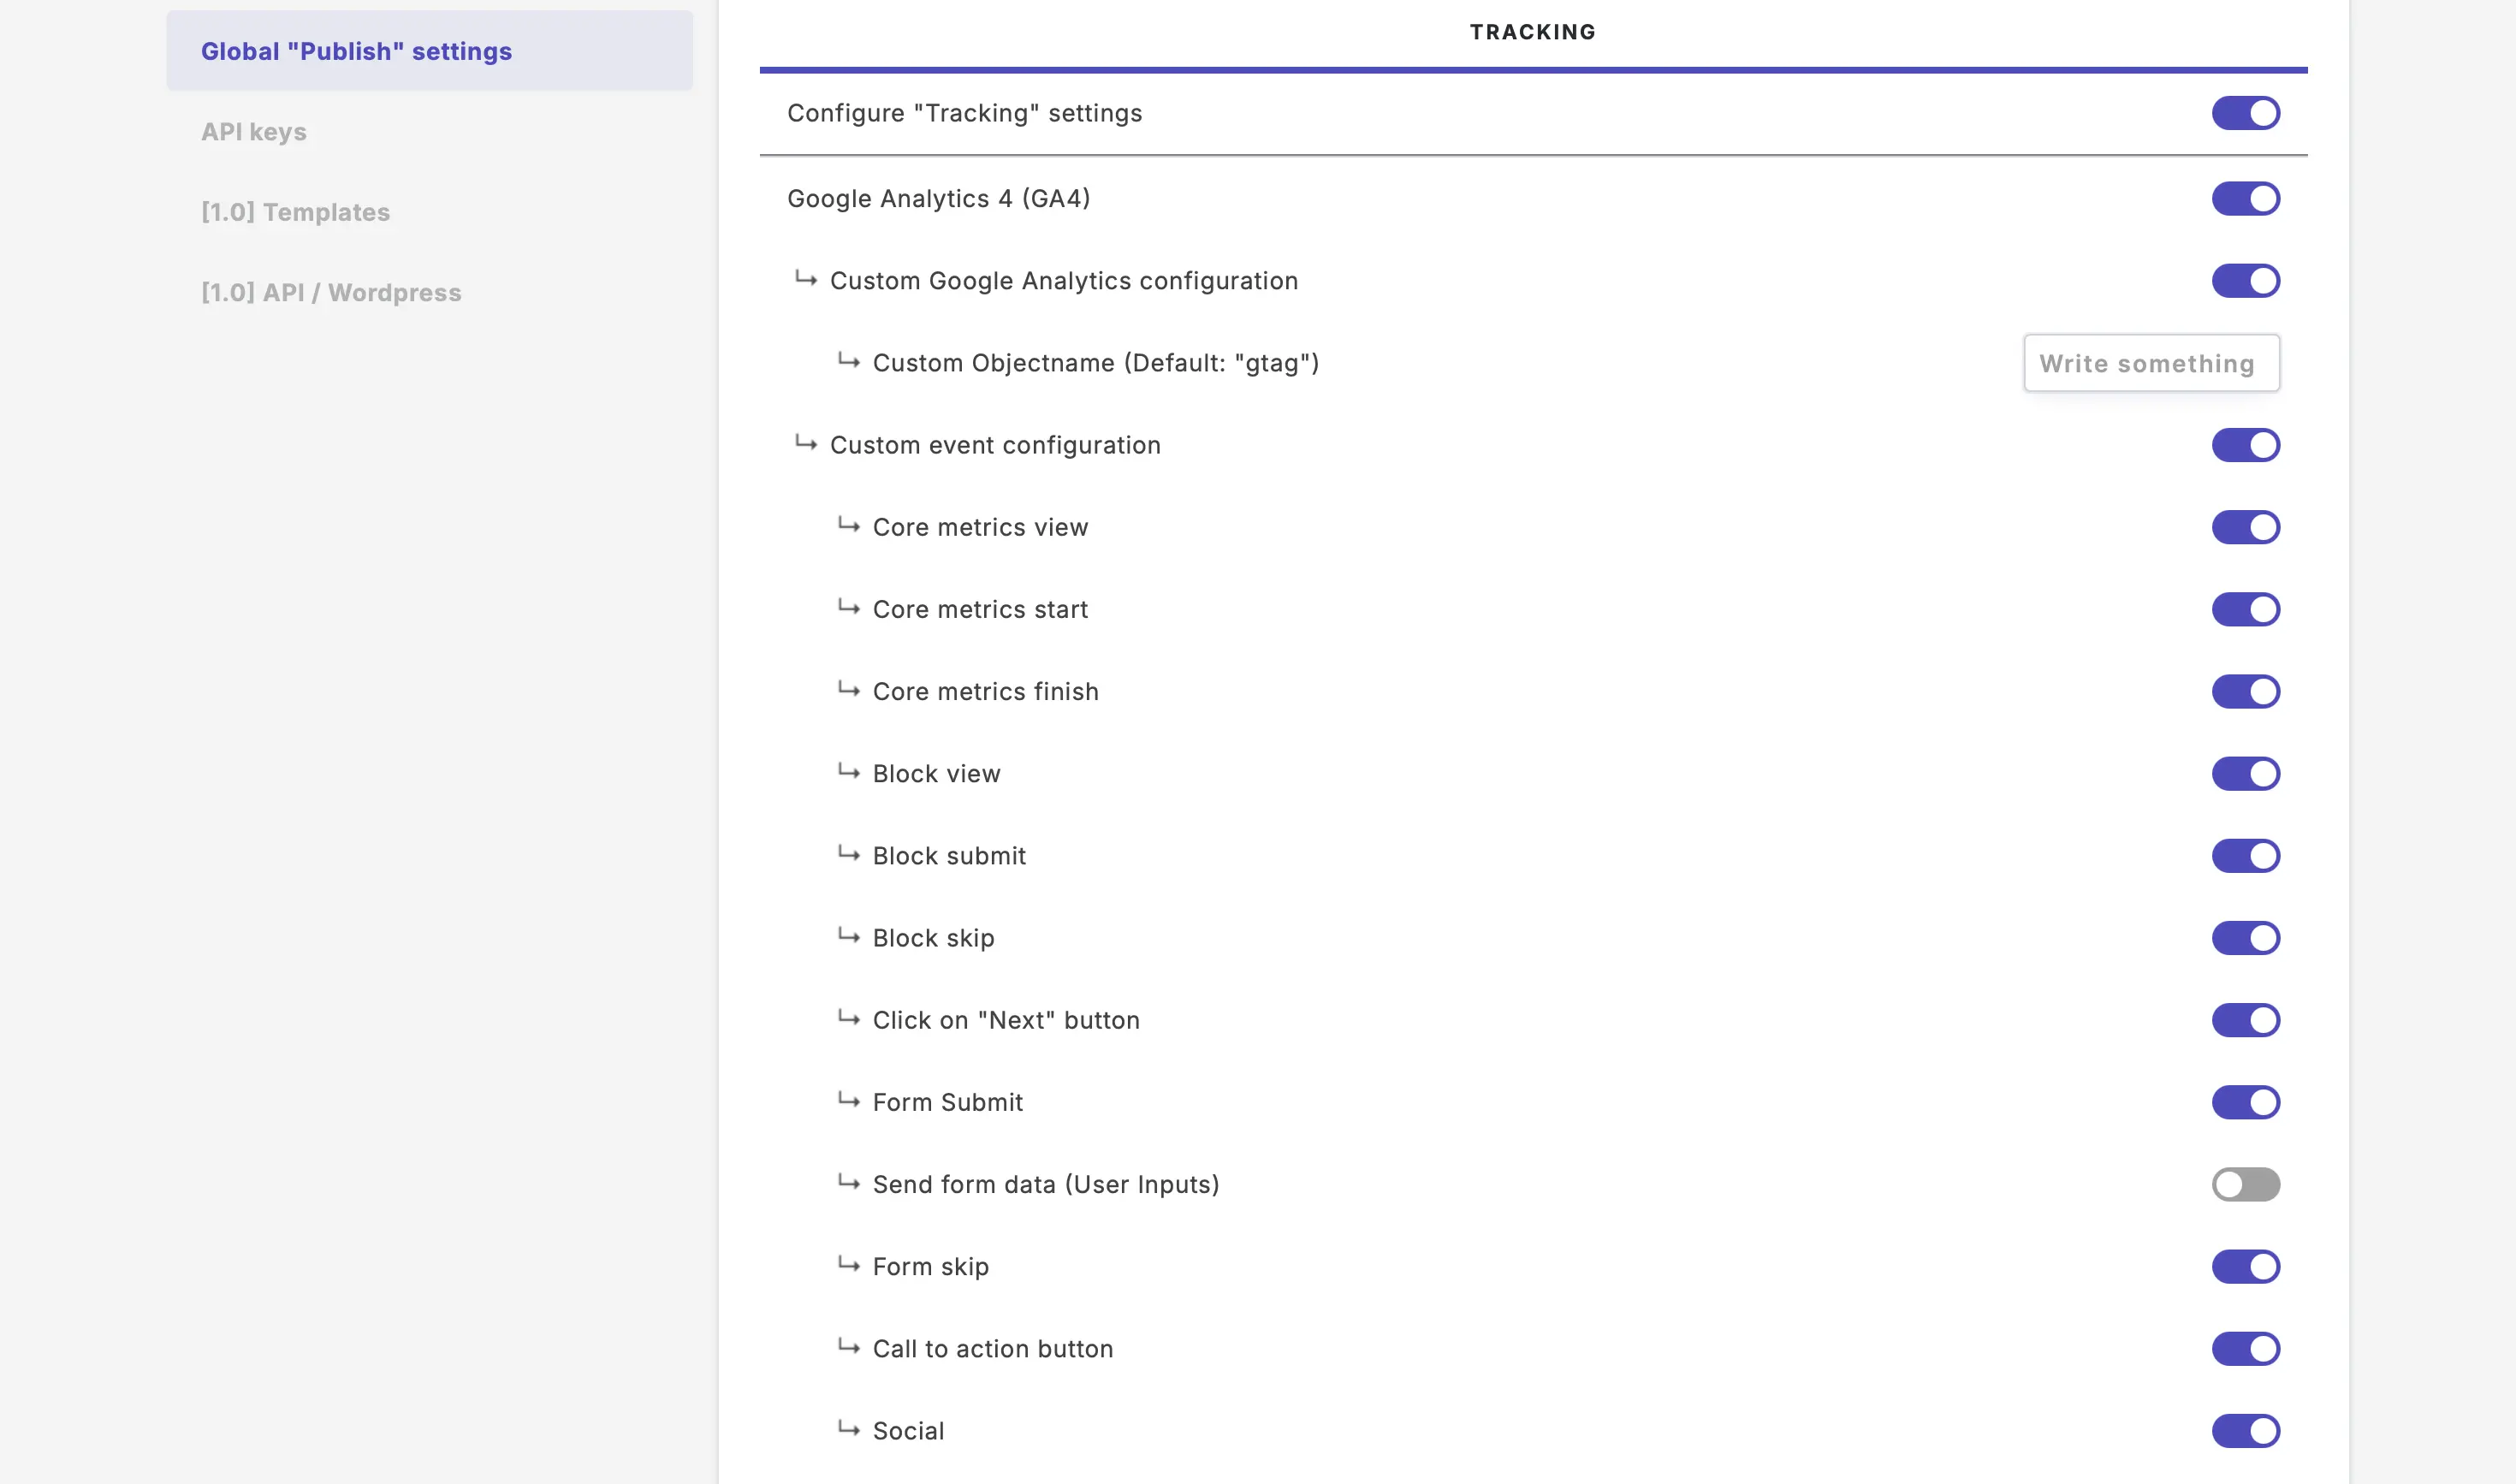
Configure project tracking settings
- Go to the main menu in the top right corner and click on Your projects under COLLABORATION.
- Click on one of your projects.
- Click on Global "Publish" settings > TRACKING and then enable Configure "Tracking" settings and enable the tracking tools required.
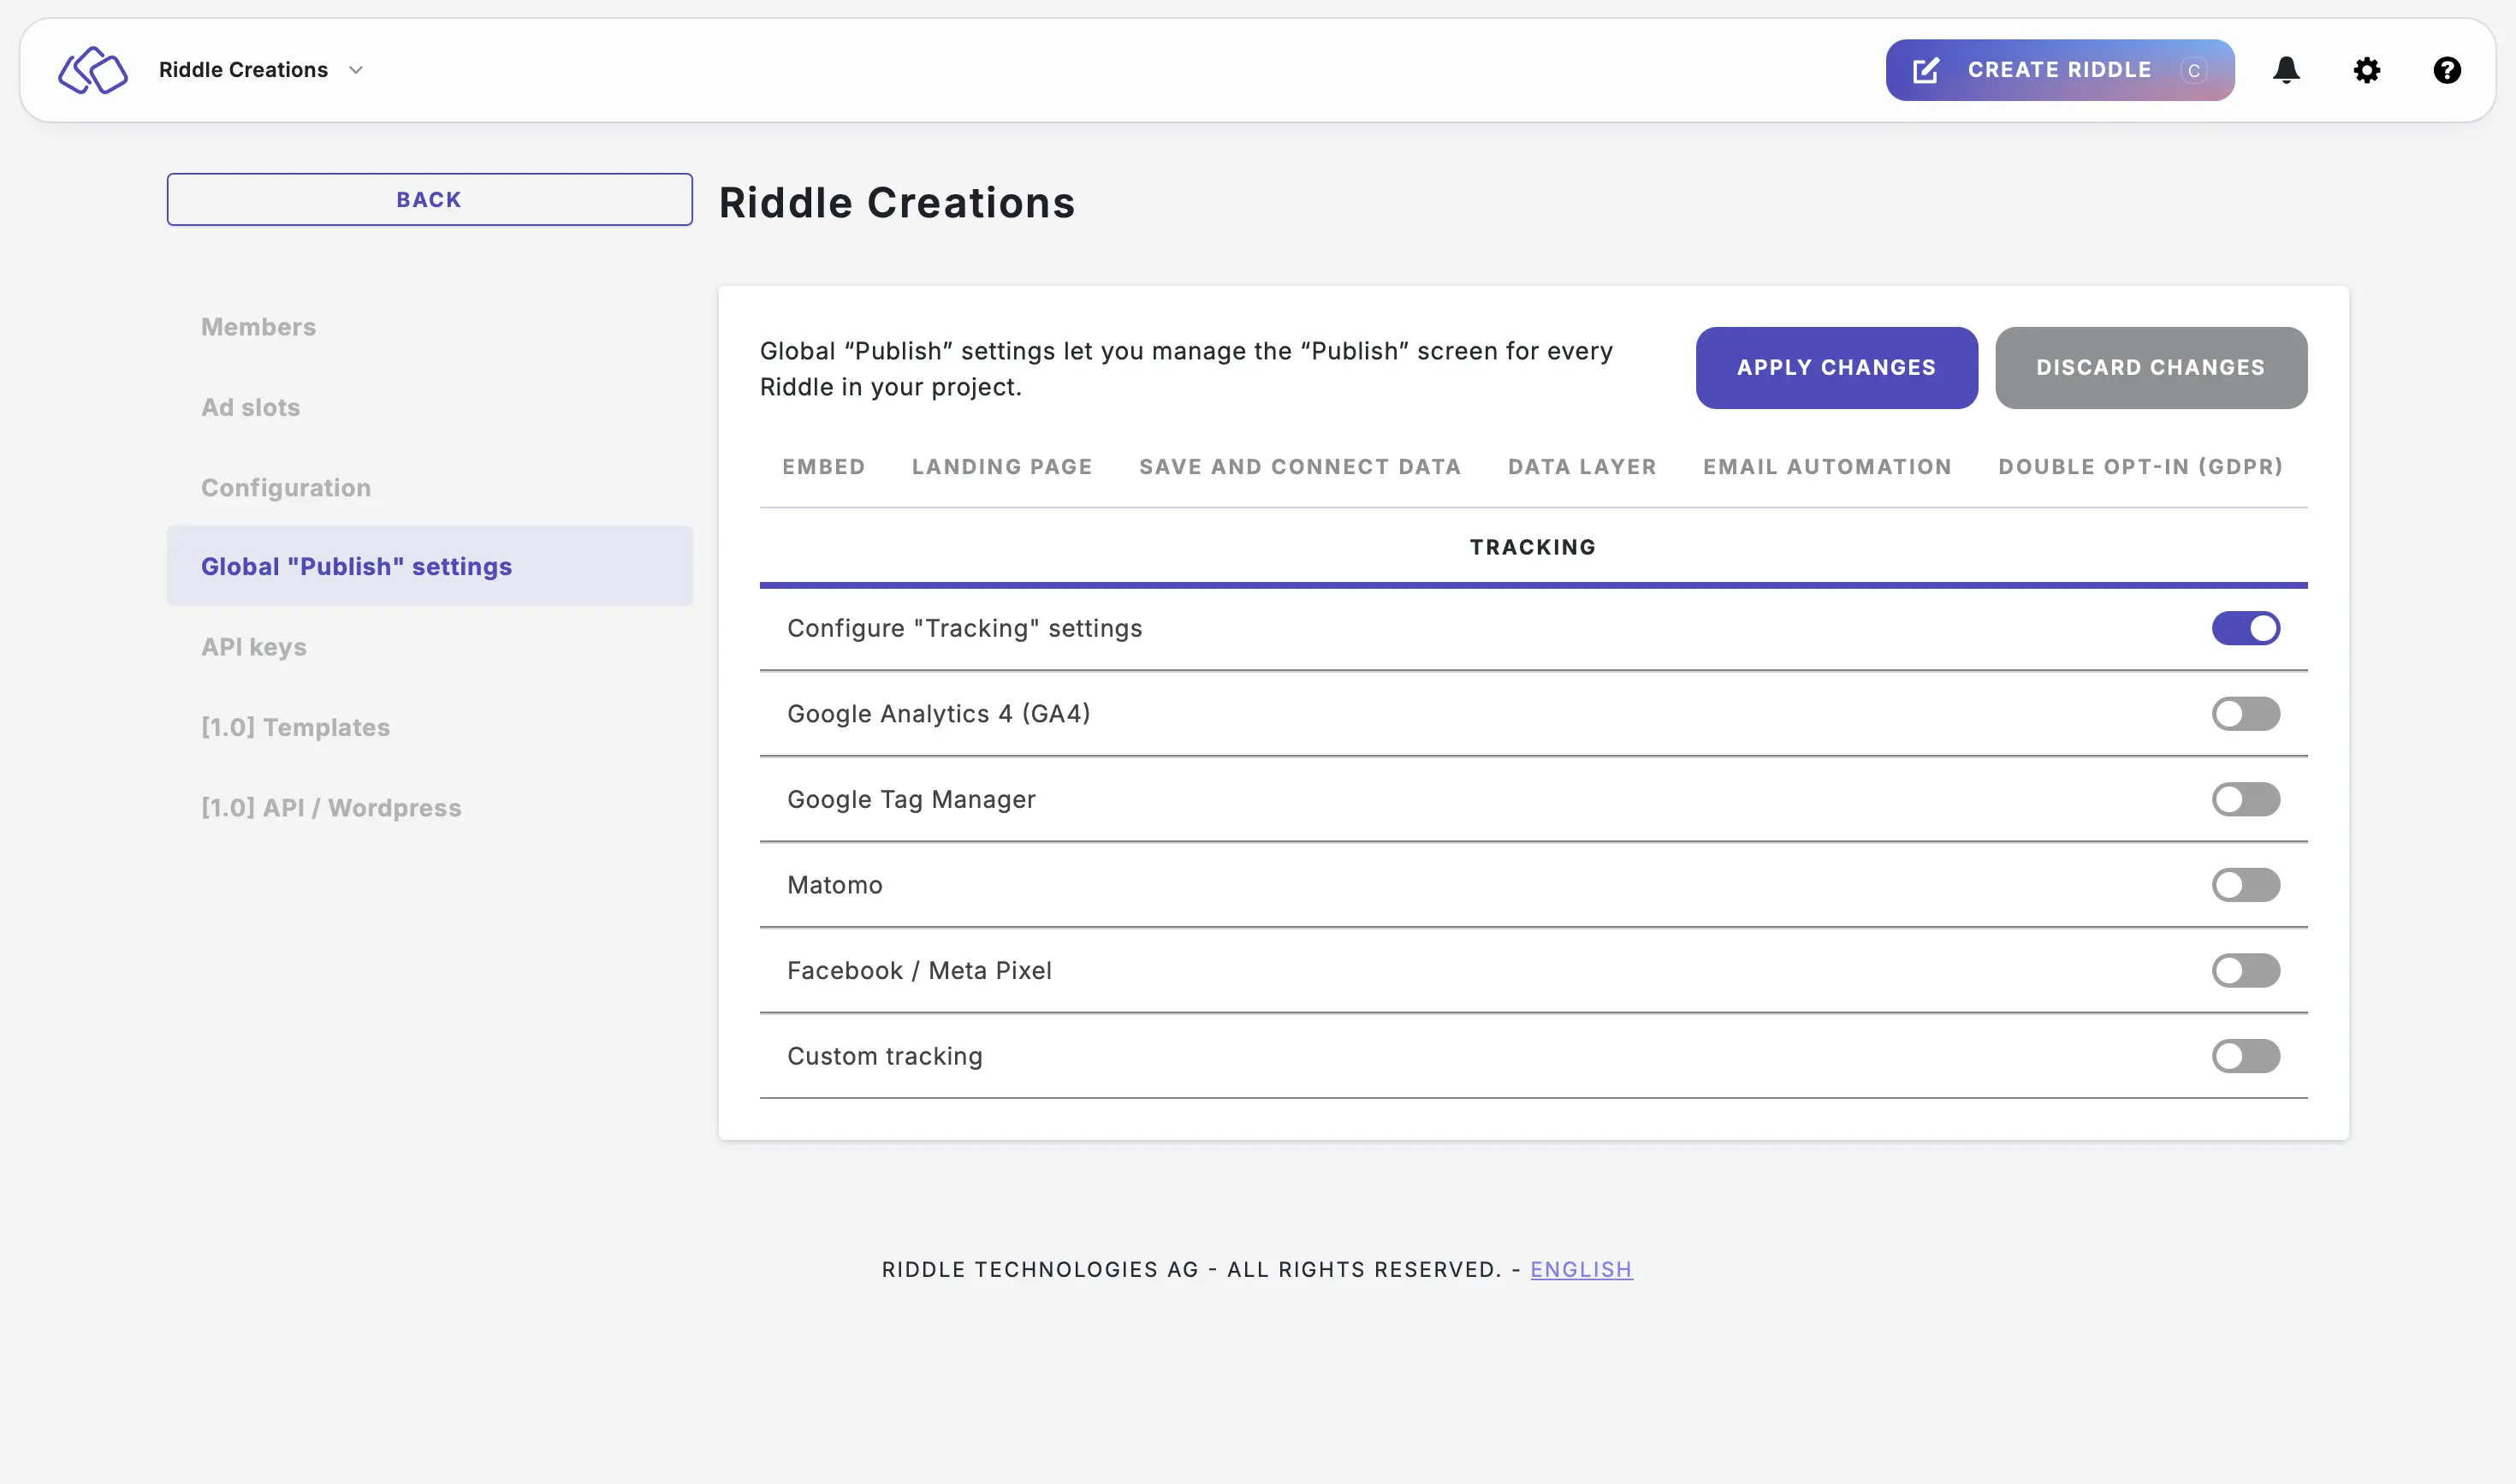
- For any enabled tool, enable custom configuration and which custom events you would like to track (optional).
- Click on APPLY CHANGES or continue making other changes. Applying the settings can take up to five minutes.